


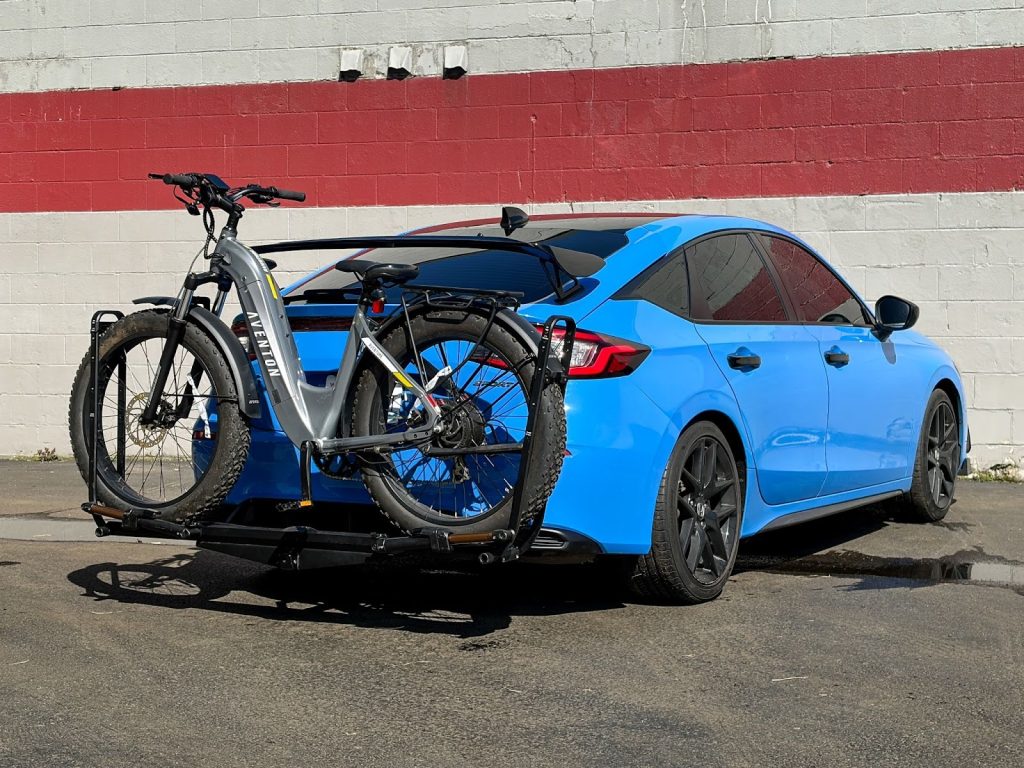
If you’re looking to add versatility to your Honda Civic, whether it’s for bikes, cargo carriers, or light-duty towing, the EcoHitch X7512S is a clean, vehicle-specific solution that fits right into place of your factory crossmember.
This installation can be a DIY install as it is a bolt on application and I’ll walk you through it step-by-step just like we would in the shop. Take your time, stay organized, and you’ll have a professional-looking install when you’re done.
Before You Start
Recommended Tools:
- Socket set (metric)
- Trim removal tools
- Torque wrench
- Jack stands or lift
- Cutting tool (for bumper trimming)
- Marker or tape
Pro Tip: Having a second set of hands for bumper removal makes things much easier.
Step 1: Prep the Vehicle and Remove Lower Hardware
Start by safely raising the vehicle using Honda-approved lifting points.
Then:
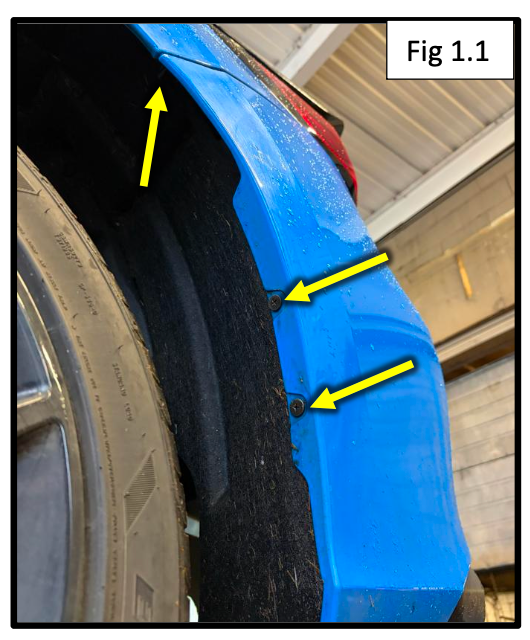
- Remove three screws in each rear wheel well
- Remove mudflaps if equipped
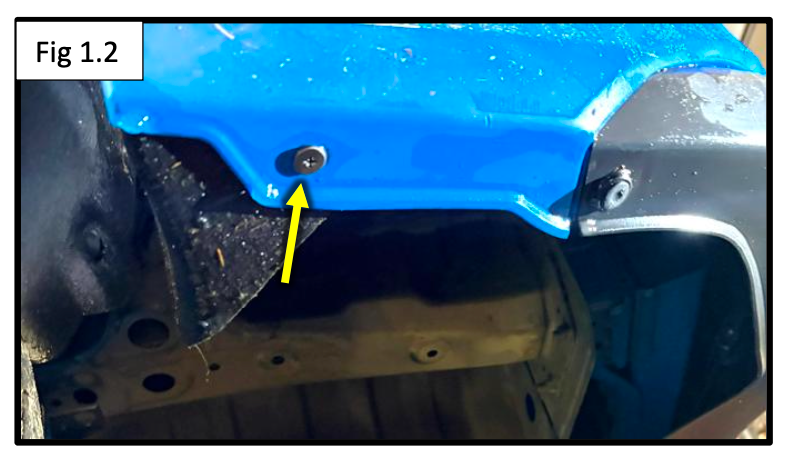
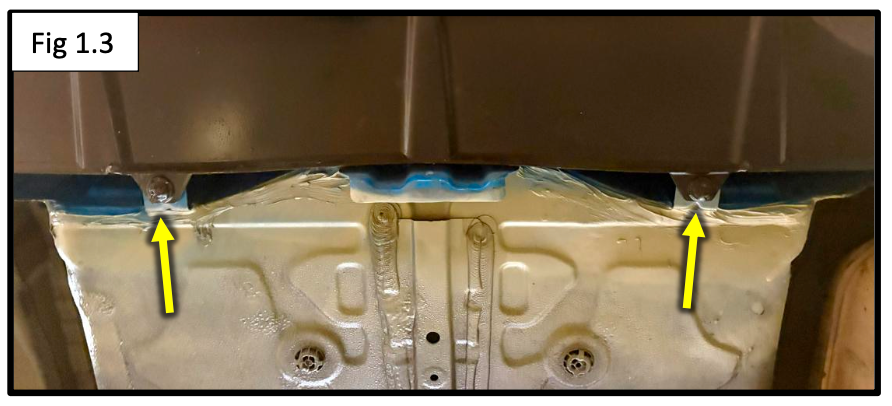
- Remove the bottom screws and clips securing the bumper
- If your Civic has a lower cover panel, remove its clips/screws and pull it down out of the way
Keep all hardware organized, you’ll be reinstalling most of it later.
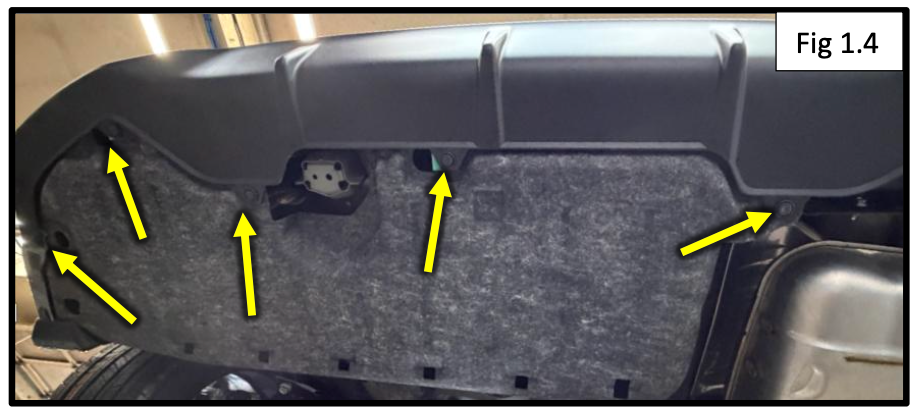
Step 2: Remove Taillights and Rear Bumper
Now we’ll free up the bumper:
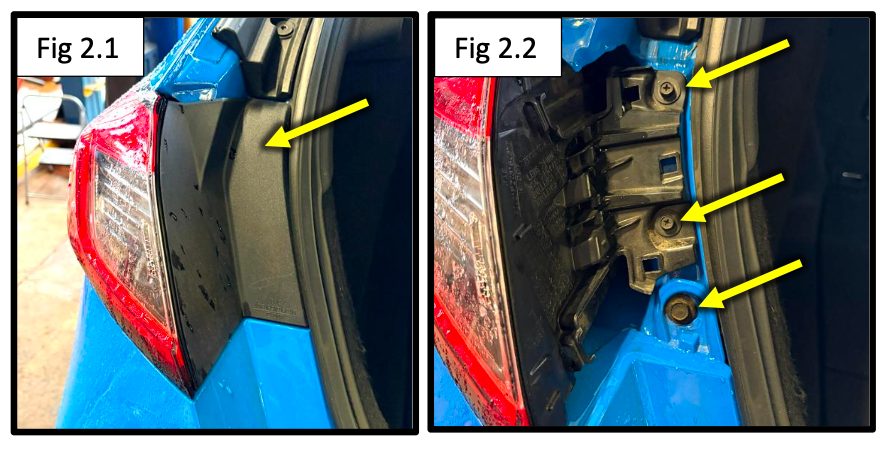
- Pop off the taillight covers
- Remove the three screws per side
- Carefully remove the taillights and disconnect the wiring harness
- Starting at the fenders, gently unclip the bumper and work toward the center
- Set the bumper aside in a safe place
Take your time here, these clips can be tight, and you don’t want to force anything.
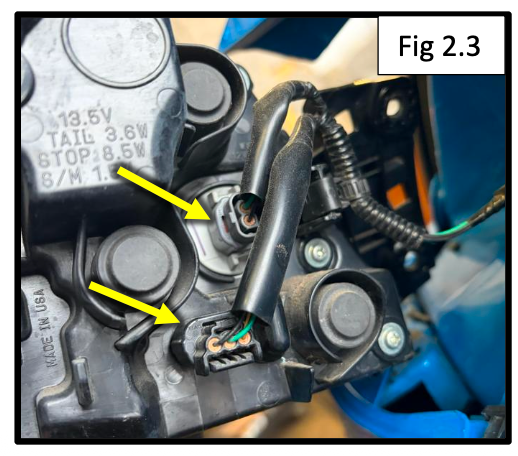
Step 3: Remove the Factory Crossmember
- Locate and remove the eight factory bolts holding the rear crossmember
- Remove the crossmember completely
This is where your EcoHitch will mount.
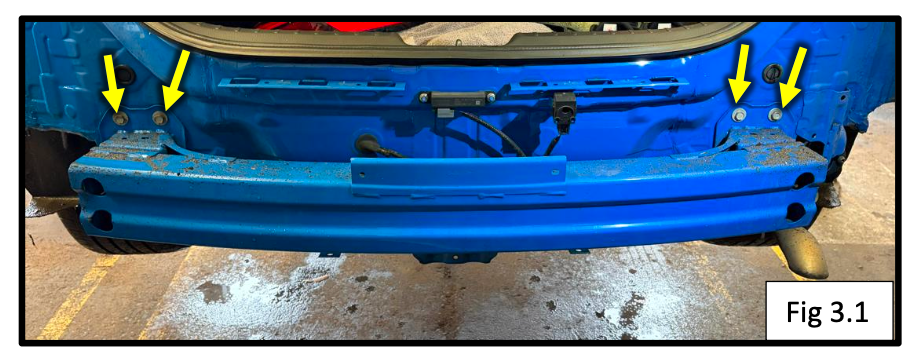
Step 4: Install Frame Support Plates
Now we’re prepping the mounting points inside the frame:
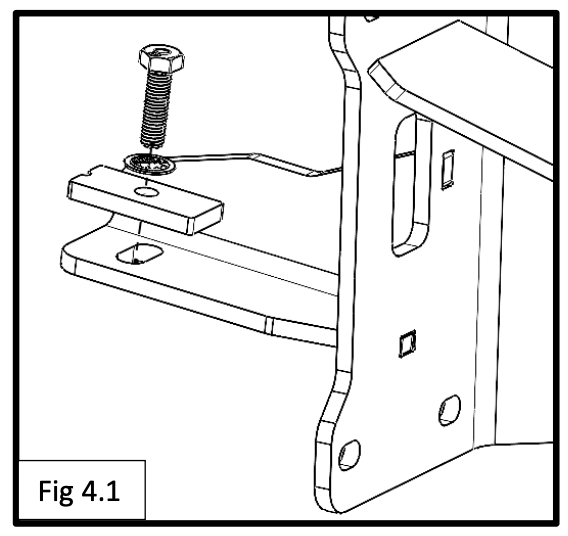
- Insert an M8 x 40mm bolt with:
- Internal tooth lock washer
- Plate washer
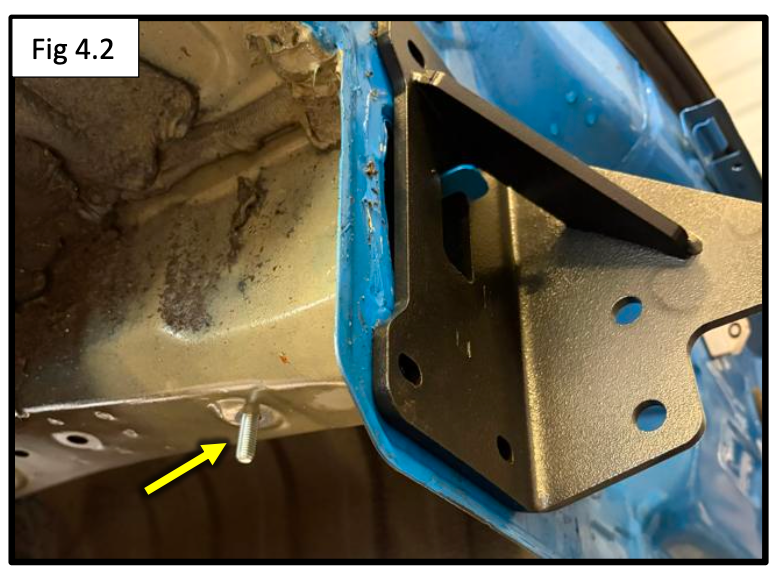
- Feed the frame support plate into the rear of the frame
- Align it so the bolt drops down through the bottom hole
Repeat this process on the passenger side.
Installer Tip: On some vehicles, temporarily lowering the exhaust can make access easier.
Step 5: Secure the Frame Plates
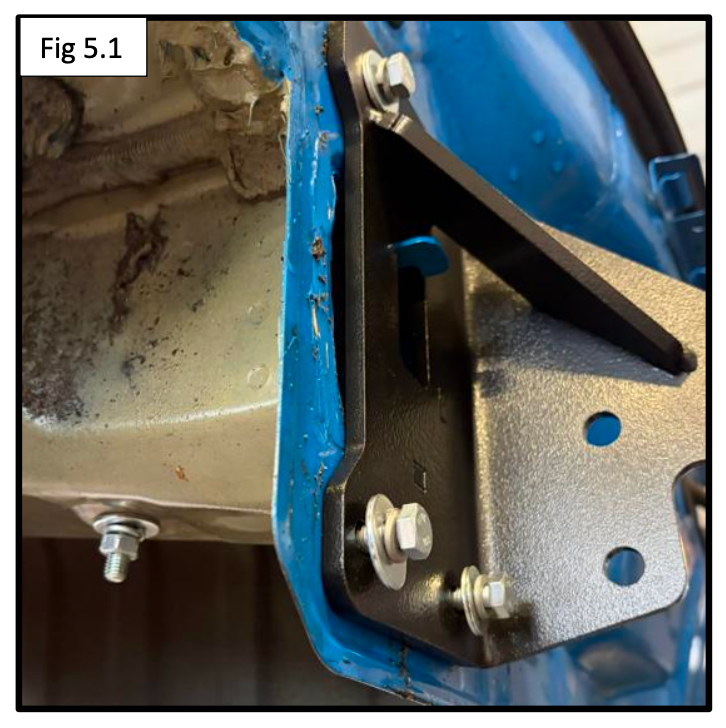
- Loosely secure the frame plates using:
- M8 bolts
- Flat washers
- Split lock washers
- Secure the bottom support bolt using:
- Flat washer
- Split lock washer
- M8 hex nut
Leave everything slightly loose for now, this helps with alignment in the next step.
Step 6: Install the EcoHitch
Time to mount the hitch:
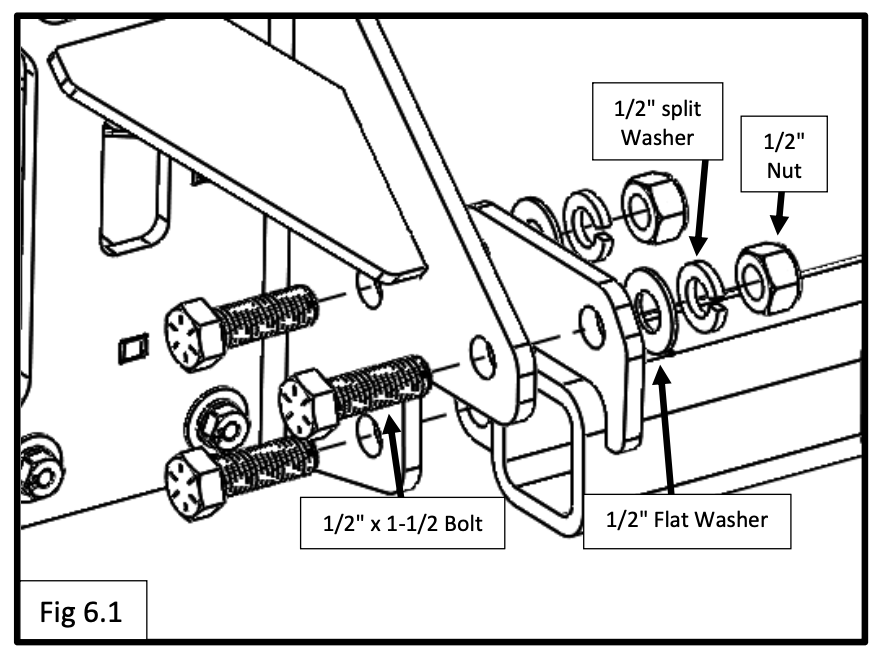
- Align the hitch side plates with the frame plate holes
- Install the 1/2" hardware (bolts, washers, and nuts)
Torque Specs:
- M8 hardware: 24 ft-lbs (34 Nm)
- 1/2" hardware: 70 ft-lbs (95 Nm)
Tighten everything evenly to ensure proper fitment.
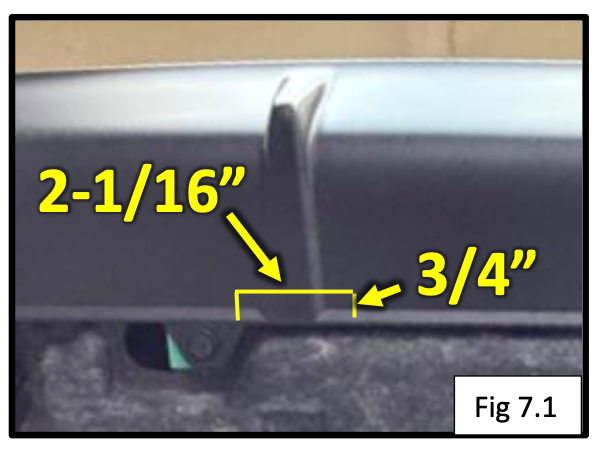
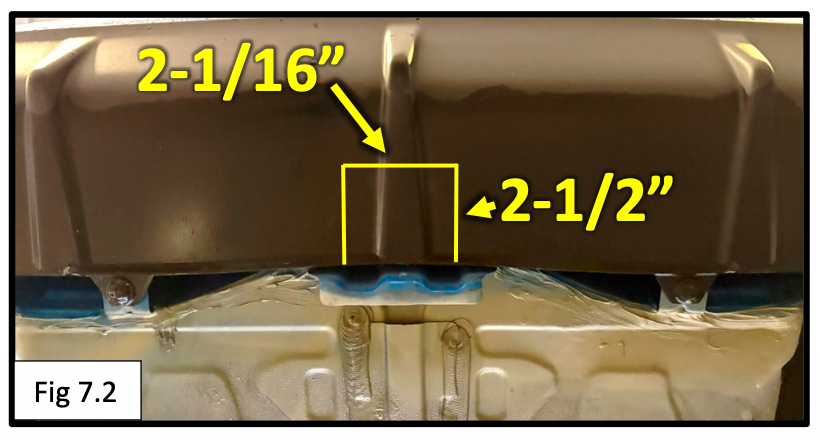
Step 7: Trim Bumper for Receiver Clearance
This is what gives the install that clean, factory look.
For Hybrid Models:
- Trim a small opening:
- 2-1/16” wide x 3/4” deep
For Non-Hybrid Models:
- Trim a slightly larger opening:
- 2-1/16” wide x 2-1/2” deep
Also:
- Trim the lower cover panel as needed for clearance
Go slow and test fit often, you can always remove more material, but you can’t put it back.
Step 8: Reinstall Everything
Now reverse your removal steps:
- Reinstall the bumper
- Reconnect wiring harnesses
- Reinstall taillights
- Reinstall all clips, screws, and panels
Test:
- Taillights
- Signals
- Brake lights
Everything should function normally.
Installation Complete
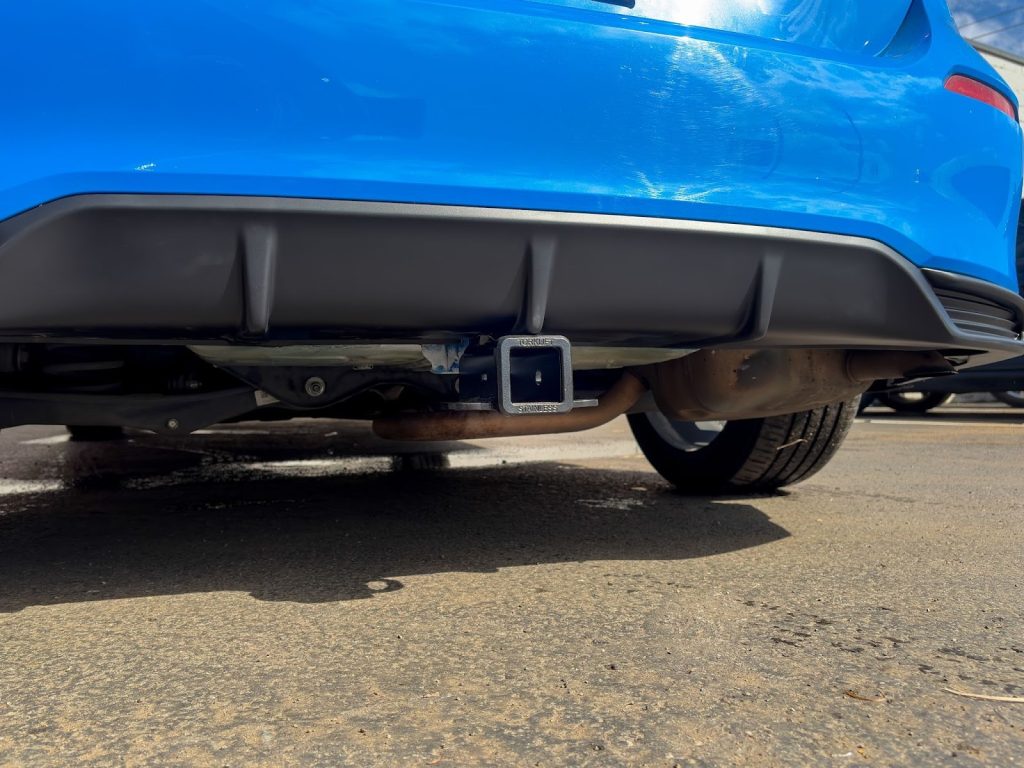
That’s it, you’ve successfully installed the EcoHitch X7512S on your Honda Civic.
You now have a clean, hidden hitch that’s ready for:
- Bike racks
- Cargo carriers
- Light towing
Take a step back, you just did a professional-level install.