This content is accurate as of June 24, 2026. Fitment details may change, so for the latest information, please visit the EcoHitch product page.
Need a front-mounted hitch for your Chevy BrightDrop? The NorthHitch X7924S is designed to add versatility to your vehicle for accessories such as cargo carriers, bike racks, winches, and other front-mounted equipment.
While this installation involves removing the front bumper, don't let that intimidate you. Taking your time and following the steps carefully will help ensure a smooth installation and a factory-quality result.
Let's get started
Before You Begin
Recommended Tools
- Socket set
- Torx bit set
- Trim removal tools
- Torque wrench
- Swivel socket adapter
- Utility knife or reciprocating saw
- Bolt fisher (included with hitch kit)
Installer Tip: Keep all hardware organized as you remove it. Many of the factory fasteners will be reused during reassembly.
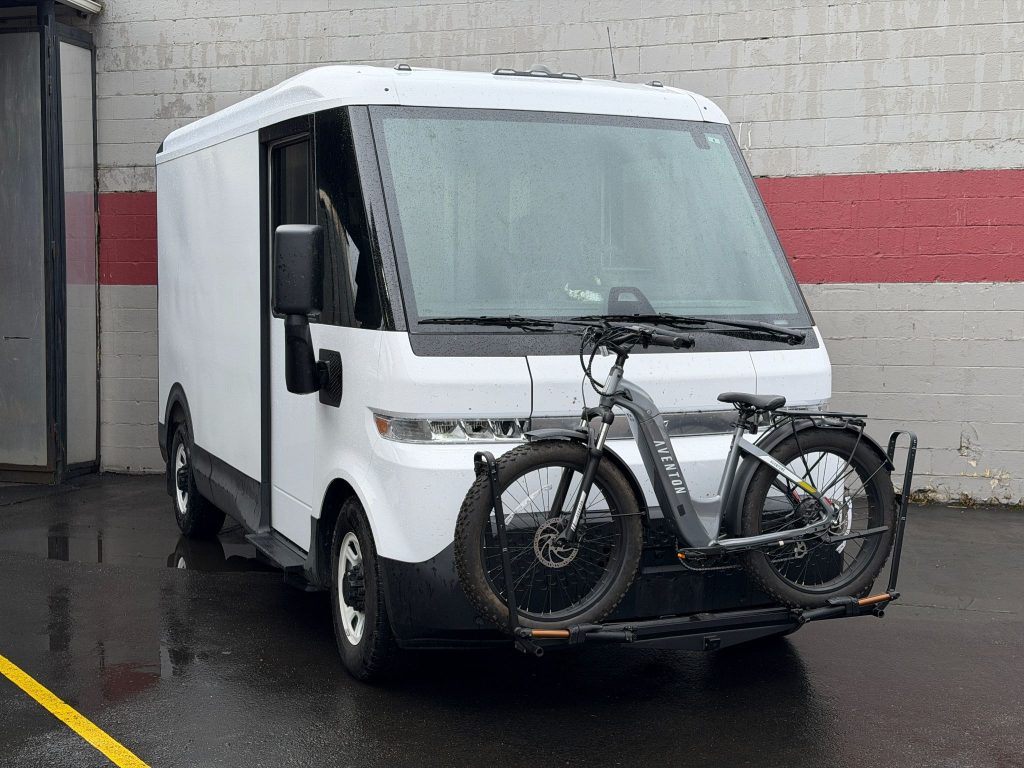
Step 1: Remove the Front Wheel Liners
The first step is gaining access to the backside of the front bumper.
Remove Wheel Liner Hardware
- Remove the Torx screws and push clips securing the wheel liners.
- Remove any additional screws connecting the front liner to the rear liner around the wheel opening.
- Remove the wheel liners and set them aside.
Access Hidden Bumper Hardware
- Open the two access covers on the front of the bumper.
- Remove the screws located underneath each cover.
Pro Tip: There are several fasteners hidden throughout the wheel well area. Take a quick look around before pulling on any panels.
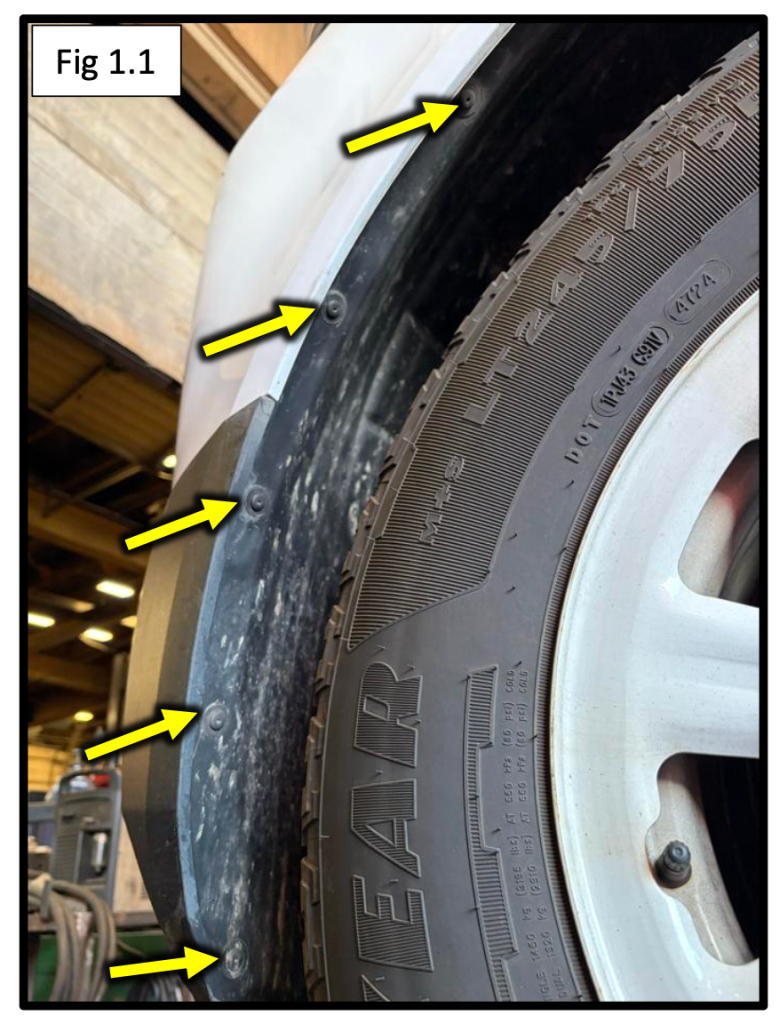
Step 2: Remove Remaining Bumper Hardware
With the wheel liners out of the way, you can access the remaining bumper fasteners.
Remove Upper Corner Fasteners
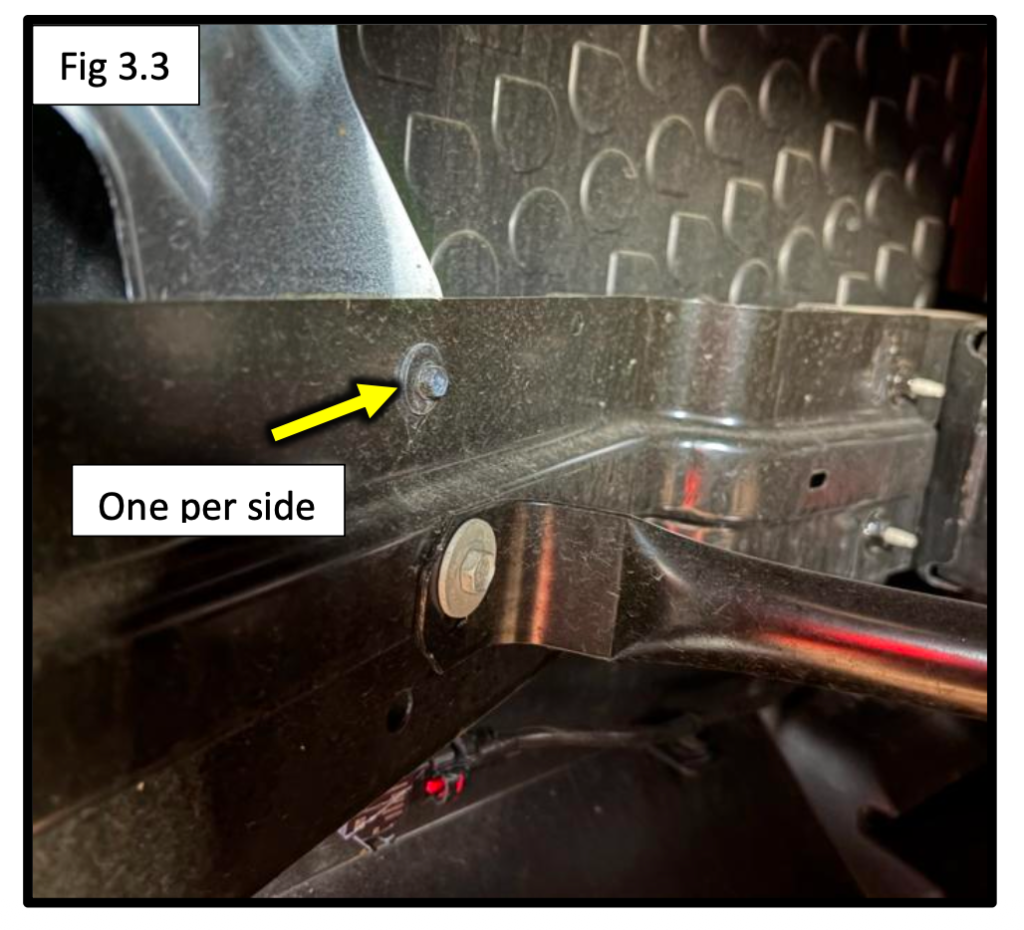
- Remove the three screws located at the upper corners of the bumper on each side.
- A socket extension with a swivel adapter makes these much easier to reach.
Remove Lower Hardware
- Remove the Torx screws and hex-head fasteners along the bottom of the bumper.
At this point, the bumper should be free except for the upper mounting hardware and wiring connections.
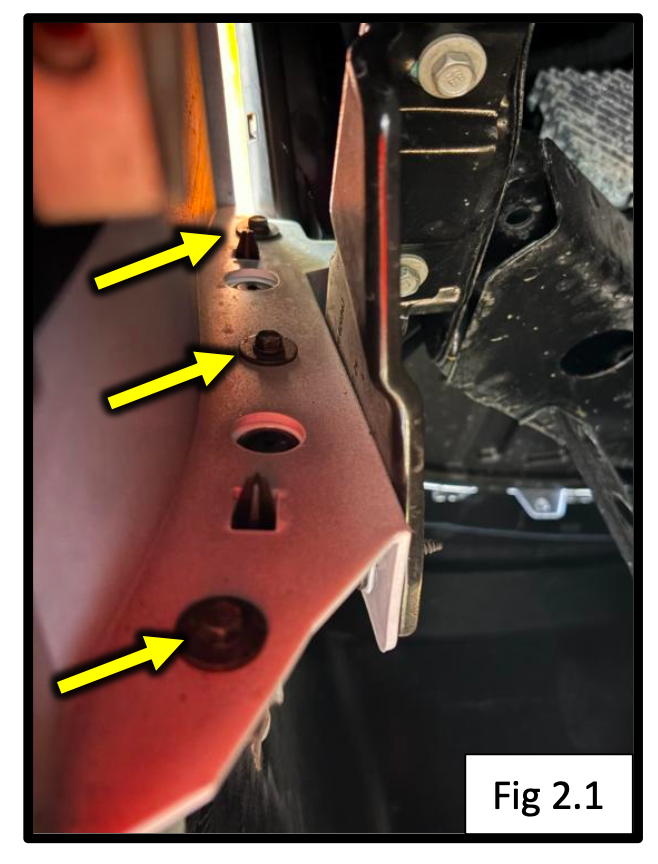
Step 3: Remove the Front Bumper
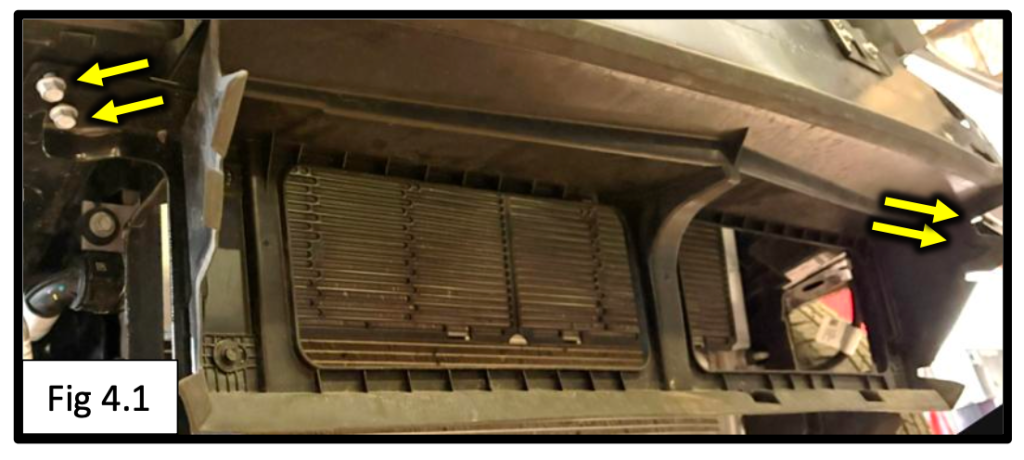
Access Hardware Under the Hood
- Open the hood.
- Remove the upper bumper hardware securing the grille and bumper assembly.
Disconnect Electrical Connectors
On the passenger side:
- Disconnect the two electrical connectors.
- Release the smaller connector clip attached to the bumper.
Remove Remaining Bumper Fasteners
- Remove the small black screws that connect the bumper to the crossmember brace.
Remove the Bumper
- Starting at the wheel wells, carefully unclip the bumper.
- Work your way toward the center.
- Set the bumper aside in a safe location.
Installer Tip: The bumper is lightweight but bulky. Having a second person help can prevent accidental scratches.
Step 4: Remove the Lower Air Guide
With the bumper removed, you'll have clear access to the front frame rails.
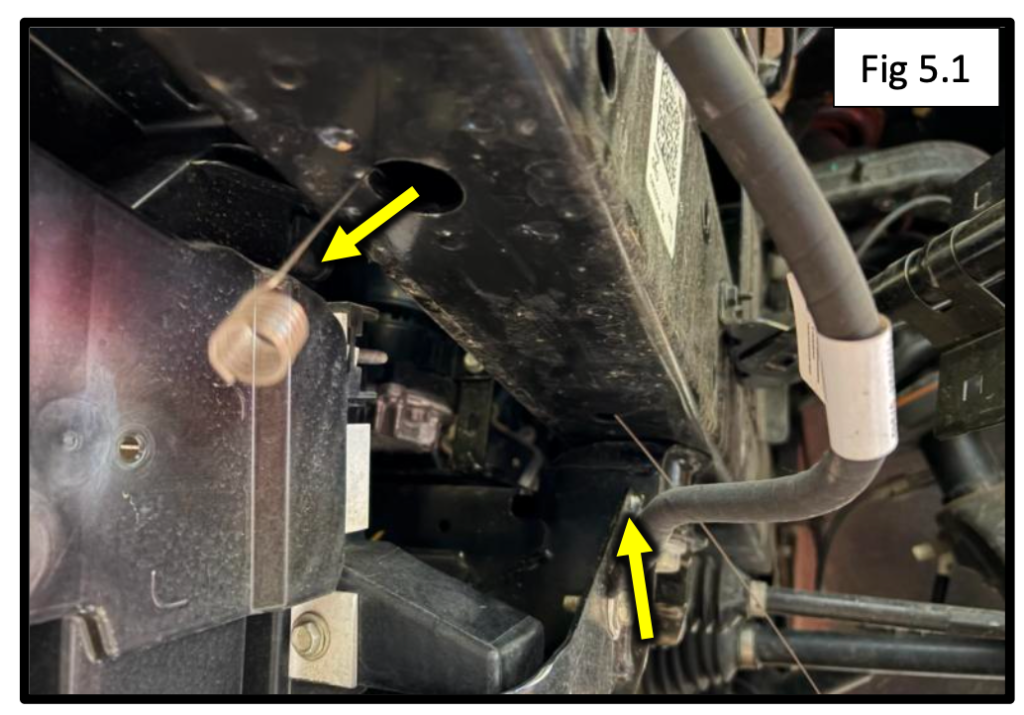
Remove the Air Guide
- Remove the four bolts securing the lower air guide.
- Remove the air guide from the vehicle.
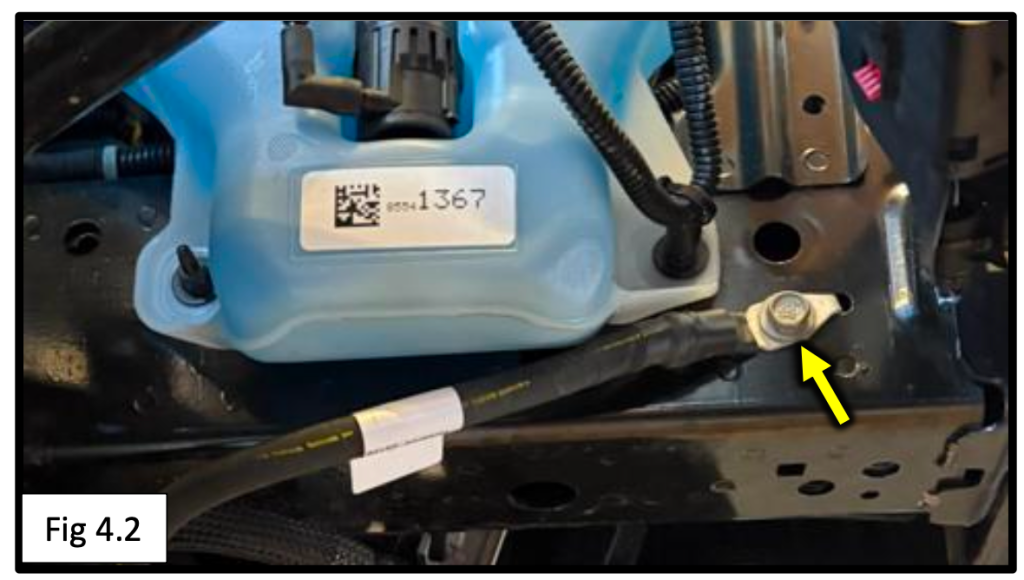
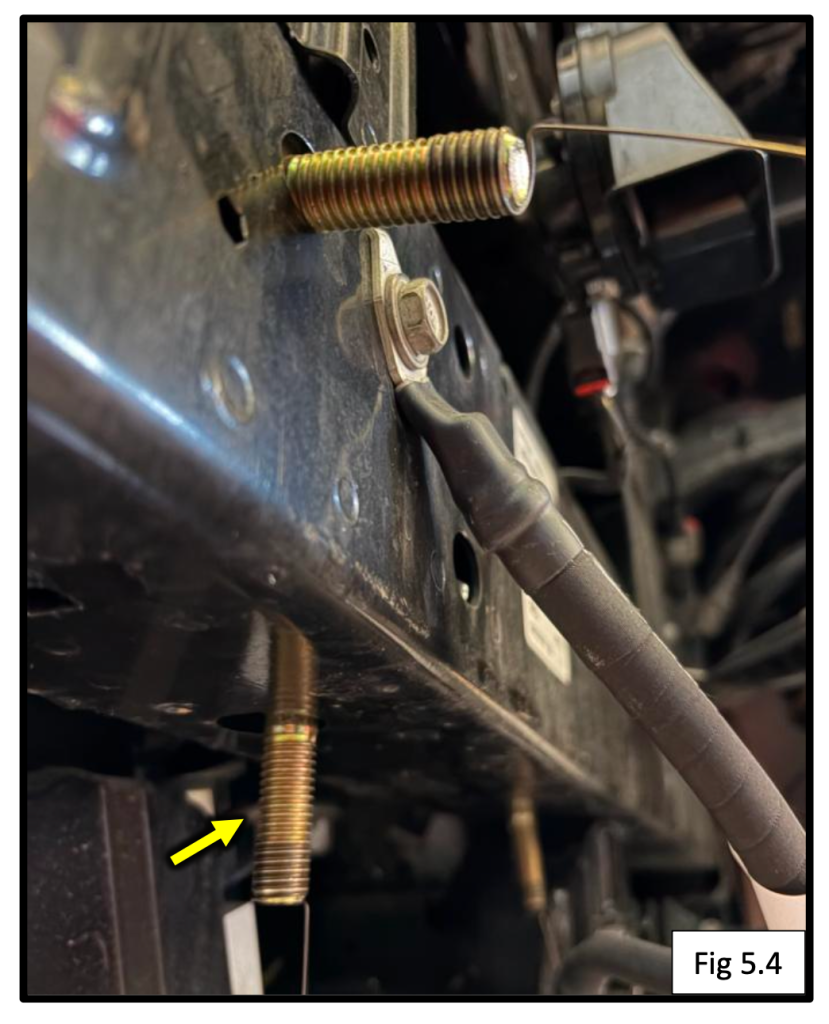
Disconnect Ground Cable
- Temporarily remove the upper ground cable connection from the passenger-side frame rail.
Be sure to keep track of this connection, you'll reinstall it later.
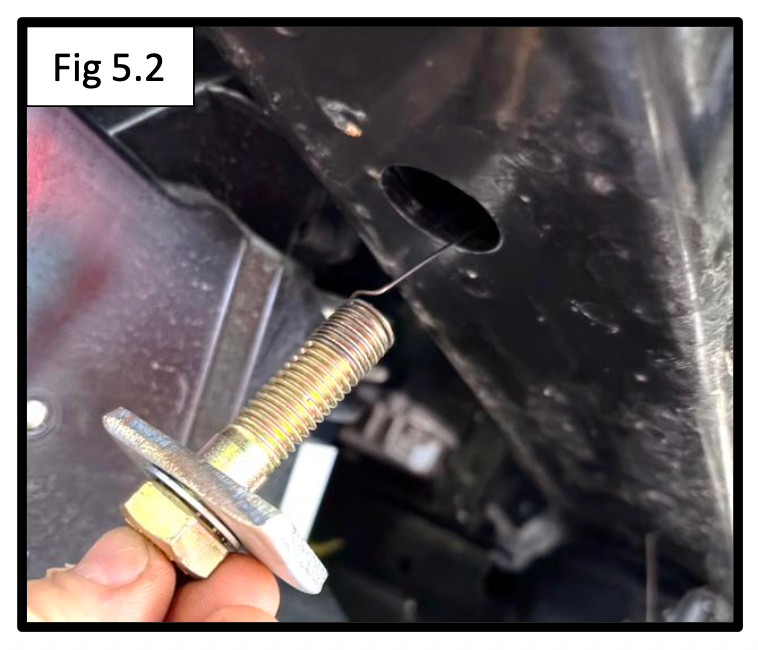
Step 5: Install the Frame Plates
This step uses the included bolt fishers to install mounting hardware inside the frame.
Fish the Rear Bolt
- Insert the coiled end of the bolt fisher into the rear frame hole and guide it out through the larger front opening.
- Attach:
- 1/2" x 2" bolt
- Internal tooth lock washer
- Plate washer
- Pull the hardware through until the bolt drops into position.
Fish the Side Bolt
- Repeat the process for the side frame hole.
Fish the Front Bolt
- Install the third bolt using the same method through the larger front opening.
Install the Driver Side Frame Plate
- Feed the fish wires through the corresponding holes in the frame plate.
- Raise the frame plate into position.
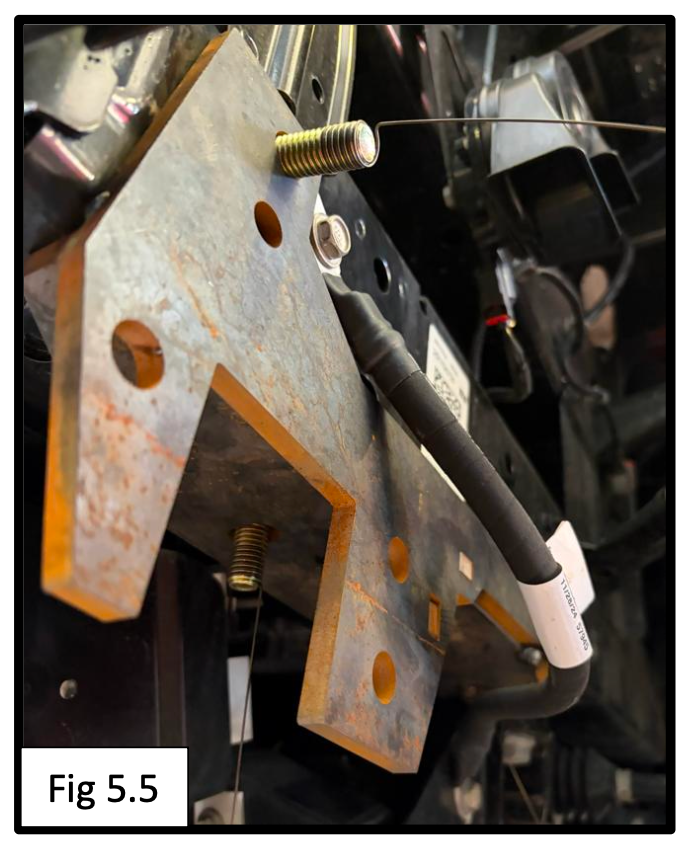
Secure the Hardware
Install:
- 1/2" flat washer
- 1/2" split lock washer
- 1/2" hex nut
on each bolt.
Repeat the entire process on the passenger side.
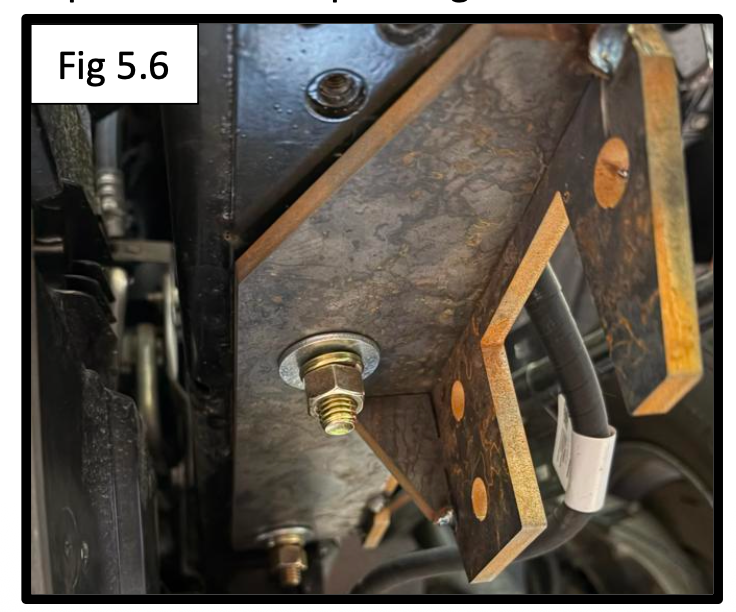
Pro Tip: Leave the hardware slightly loose until the hitch is installed to make alignment easier.
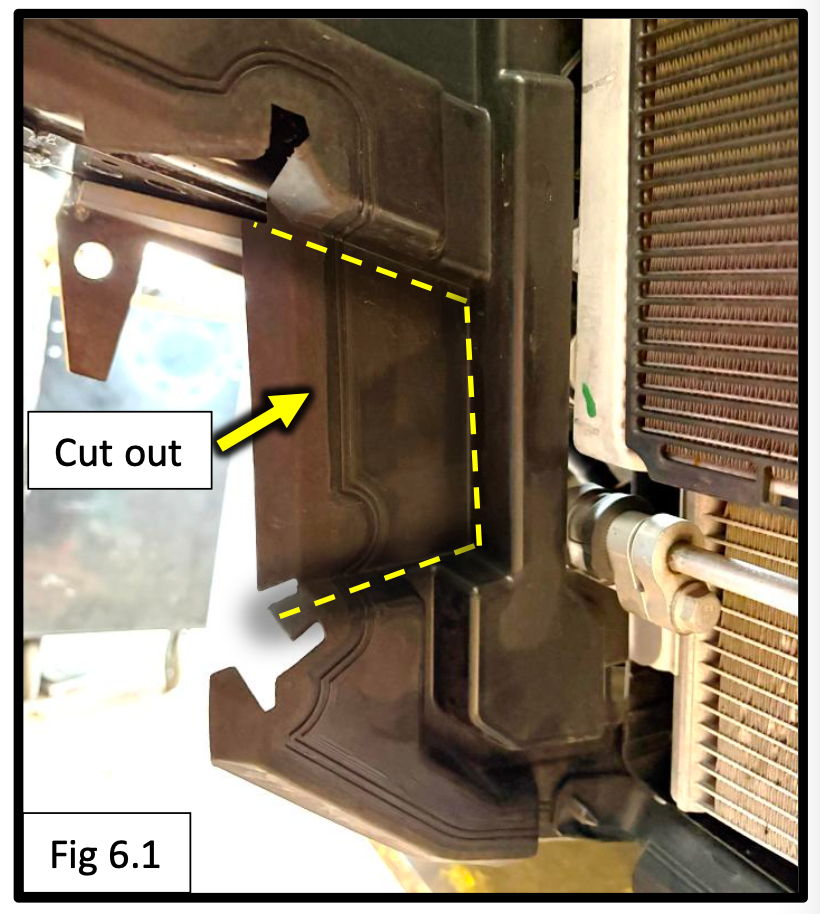
Step 6: Trim the Plastic Shrouds
To provide clearance for the NorthHitch cross tube:
- Locate the molded contour in the plastic panel.
- Trim the panel along the contour line as shown in the instructions.
- Repeat on the opposite side.
A reciprocating saw, cutoff wheel, or utility knife can all work depending on your preferred method.
Step 7: Install the NorthHitch
Now it's time to mount the hitch itself.
Position the Hitch
- Raise the hitch into place between the frame plates.
- Align the cross tube holes with the frame plate mounting holes.
Install Mounting Hardware
Install:
- 1/2" x 1-1/2" bolts
- Split lock washers
- 1/2" nuts
through all six mounting locations.
Reinstall Ground Connection
- Re-bend the passenger-side grounding tab as needed.
- Reinstall the ground cable through the passenger-side frame plate.
Torque Hardware
Torque all 1/2" hardware to: 90 ft-lbs
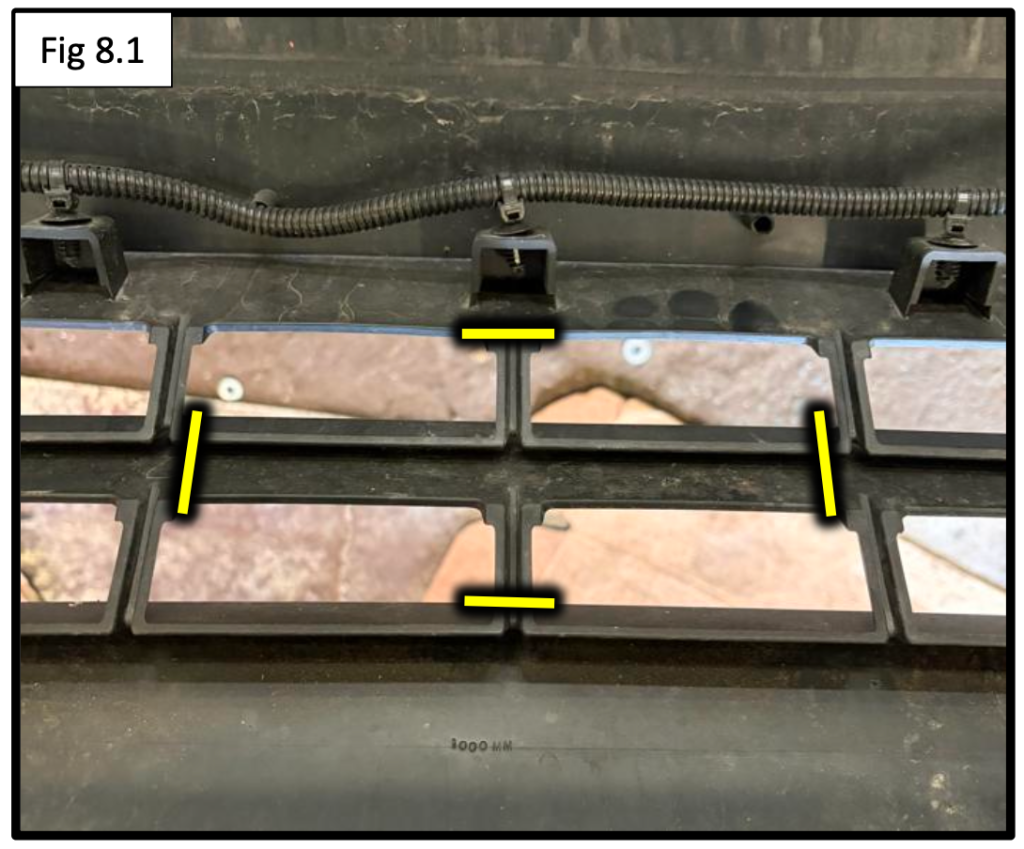
Step 8: Trim the Bumper and Reinstall
The final step is creating clearance for the receiver.
Trim the Receiver Opening
- Locate the center of the lower bumper grille.
- Trim an opening large enough for the receiver to pass through.
Start small and test fit often. You can always remove more material if needed.
Reinstall the Bumper
- Reinstall the bumper over the hitch.
- Adjust the cutout as necessary for a clean appearance.
- Reconnect all electrical connectors.
- Reinstall all factory hardware and trim components.
Installation Complete
Congratulations! Your NorthHitch X7924S is now installed on your 2022–2026 Chevrolet BrightDrop.
You now have a rugged front-mounted receiver ready for:
- Cargo carriers
- Bike racks
- Recovery equipment
- Winches
- Worksite accessories