


A practical checklist for customers who want confidence that the installation was done right.
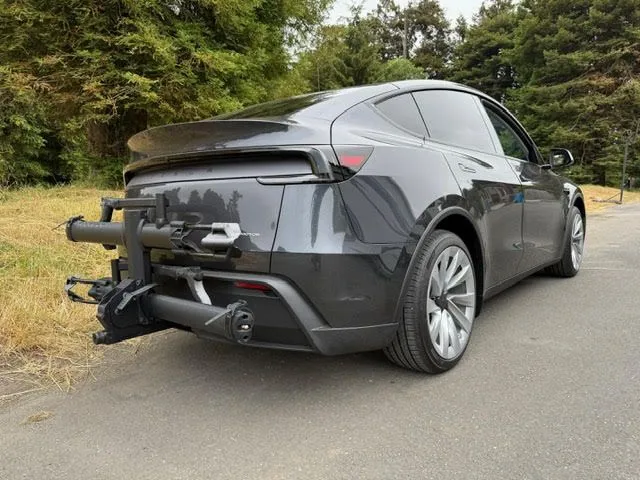
The impact bar came off. The hitch went on. The bumper cover is back in place. And now you want to know: was it done right? That is the right question to ask. A properly engineered hitch, installed according to the manufacturer's instructions, is a common and accepted vehicle modification. But "properly installed" is doing a lot of work in that sentence. Here is what it actually means.
Start with the Right Hitch
Before the installation even begins, the hitch should be the correct one for the vehicle. That means it is designed for the specific year, make, model, and trim. Not a universal fit. Not an adaptation from a similar vehicle. A vehicle-specific hitch accounts for the frame geometry, bumper system layout, sensor positions, exhaust routing, and available mounting points of that vehicle.
When you buy from Torklift, the fitment is verified by the engineering team that designed the hitch. Check fitment at torklift.com before purchasing.
Follow the Manufacturer's Written Instructions
The single most important standard for a correct installation is the hitch manufacturer's written installation instructions. These instructions specify which parts to remove, where to mount the hitch, which hardware to use, what torque values to apply, and what to verify after installation. If the instructions call for removing the bumper crossmember, that is part of the engineered installation. If they do not, it should not be removed.
The Installation Checklist
| Check | What to Verify | Why It Matters |
| Vehicle-specific fitment | Hitch is confirmed for the exact year, make, model, and trim. | Wrong fitment means wrong mounting points, clearances, and geometry. |
| Manufacturer instructions followed | Every step in the written instructions was completed. | Skipping steps risks incorrect fitment, loose hardware, or interference. |
| Correct hardware | All included bolts, nuts, washers, and spacers used. No substitutions. | Hardware grade and size affect structural integrity. |
| Torque specifications | All fasteners torqued to the values in the instructions. | Under-torque risks loosening. Over-torque risks damage. |
| No unauthorized modifications | No cutting, welding, or drilling beyond what the instructions specify. | Unauthorized modifications compromise the engineered fitment. |
| Bumper cover refitted | Fascia reinstalled with proper clips, alignment, and clearance. | A loose or misaligned cover can rattle, detach, or look unfinished. |
| Lighting function | All taillights, brake lights, reverse lights, and turn signals work. | Required for legal operation and safety. |
| Sensor function | Parking sensors, blind-spot monitors, and cameras function normally. | Sensor interference affects convenience and safety features. |
| Exhaust clearance | Exhaust pipes are not contacting or too close to the hitch. | Heat and vibration can cause damage if clearance is insufficient. |
| Spare tire access | Spare tire can still be accessed and removed if needed. | Some hitches are near the spare tire location. |
| Wiring (if installed) | Trailer wiring connector installed, tested, and functioning. | Required for towing with trailer lights. |
What to Ask Before Buying a Hitch
- Is this hitch designed for my specific vehicle year, make, model, and trim?
- Does the installation require removing the OEM bumper crossmember?
- Are written installation instructions included?
- Is all required hardware included?
- What are the towing and tongue weight ratings?
- Does the hitch affect the kick sensor, parking sensors, or exhaust?
- What warranty covers the hitch?
What to Keep After Installation
Keep the installation instructions, the purchase receipt, the product information sheet, any warranty documentation, and photos of the completed installation. These records document that the hitch was the correct product and was installed according to the manufacturer's engineering.
When to Contact Torklift Support
If you have questions about fitment, installation procedures, hardware, or post-installation concerns, contact Torklift directly. We are the manufacturer. We wrote the instructions. We designed the hitch for your vehicle. Our support team can help with vehicle-specific questions before, during, and after installation.
Key Takeaways
- A correct installation starts with the right hitch: vehicle-specific, not universal.
- The manufacturer's written instructions are the standard. Every step matters.
- Use the checklist: hardware, torque, bumper cover, lights, sensors, exhaust, spare tire, wiring.
- Keep installation records: instructions, receipt, product info, warranty, and photos.
- Contact Torklift support with vehicle-specific questions before, during, or after installation.
Frequently Asked Questions
How do I know my hitch installation was done correctly?
Verify vehicle-specific fitment, confirm the manufacturer's instructions were followed, check hardware and torque specs, verify bumper cover fit, test lights and sensors, and confirm exhaust and spare tire clearance.
Should the installer follow the hitch manufacturer's instructions?
Yes. The written installation instructions are the standard for proper installation. Skipping steps or substituting hardware risks incorrect fitment.
Why do torque specs and hardware matter?
Hardware grade and torque values are specified to ensure structural integrity. Wrong hardware or incorrect torque can compromise the installation.
What vehicle systems should be checked after installation?
Taillights, brake lights, turn signals, reverse lights, parking sensors, blind-spot monitors, cameras, exhaust clearance, spare tire access, and bumper cover alignment.
What should I keep after installation?
Installation instructions, purchase receipt, product information, warranty documentation, and photos of the completed installation.
When should I contact Torklift support?
Any time you have questions about fitment, installation procedures, hardware, post-installation concerns, or vehicle-specific details. We designed the hitch and wrote the instructions.