


Installation Disclaimer: This blog is intended as a general reference only. It may not include every step, tool, torque specification, or vehicle-specific detail needed for your installation. Always refer to the official installation instructions included with your product for the complete procedure, required tools, torque values, safety information, and fitment details.
Why Install a Front-Mounted Hitch on Your F-150?
The Torklift NorthHitch X7913S transforms your Ford F-150 into an even more versatile workhorse. This front-mounted hitch increases your truck's capabilities by allowing you to attach any hitch accessory from a snowplow to a bike rack.
Built in the USA with a lifetime warranty, the X7913S features Torklift's exclusive patent pending stainless steel receiver. The hitch is powder-coated with premium Armor Pro Finish and built to last, giving you confidence in its durability for years to come.
What You'll Need
Before starting your installation, gather the following tools:
- 1/2-inch bolt fisher
- Pry tool
- 10mm socket
- Torque wrench (for final torquing to 75 ft-lb)
Step 1: Remove the Active Front Air Dam (If Equipped)
Some newer F-150 models are equipped with an active front air dam. If your truck has this feature, you'll need to remove it before proceeding.
Start by removing the three fasteners per side and removing the blade assembly. This component will not be re-installed and is not required for operation of the truck.
Next, remove the three nuts per side securing the active air dam actuators. Disconnect the electrical connectors and remove the actuators.
Step 2: Remove the Bumper Air Deflector
If your vehicle wasn't equipped with the active air dam, this is where your installation will begin.
Remove the bumper air deflector by using a pry tool and 10mm socket. Remove the clips and bolts securing the deflector.
Step 3: Install the Driver Side Plate
Starting on the driver's side, use a 1/2-inch bolt fisher to fish a 1/2 inch x 2 inch bolt with a 1x2 inch plate washer and star washer into the frame. Pull the bolt assembly through hole A out through the lower mounting hole C in your instructions.
Repeat this process to fish bolts into the remaining frame holes, leaving the bolt fishers attached where needed.
Place a 1 inch x 3 inch plate washer over the bolts protruding from the frame. Align the plate washers so the long edge is vertical.
Feed the bolt fishers through the driver side plate and position the plate against the frame. Note that the driver side plate has the top slotted holes closer together and the large square opening should face toward the rear.
Remove the bolt fishers and secure each bolt with a flat washer, lock washer, and nut. Leave all hardware loose.
Step 4: Install the Passenger Side Plate
Repeat the same process on the passenger side. Attach bolt fishers to the remaining frame bolts and guide them through the vertical holes in the cross tube.
Step 5: Trim the Air Deflector (If Equipped)
If equipped, locate the center of the lower air deflector. Using the instruction measurements as a guide, mark and trim the top of the air deflector to match.
Step 6: Install the Cross Tube
Raise the cross tube into position. Pull the bolts through and install flat washers, lock washers, and nuts. Leave the hardware loose.
Install 4 1/2 inch to 13 x 1/2 inch bolts per side through the side plates and cross tube. Secure with lock washers and nuts, keeping all hardware finger tight.
Step 7: Torque All Hardware
Once all other steps are complete, snug and torque all hardware to 75 ft-lb.
Step 8: Reinstall the Air Deflector
The last step is to test fit the air deflector and verify clearance at the cutout. Trim if necessary. Once satisfied, reinstall the air deflector using the factory hardware.
The installation of your Ford F-150 NorthHitch is now complete.
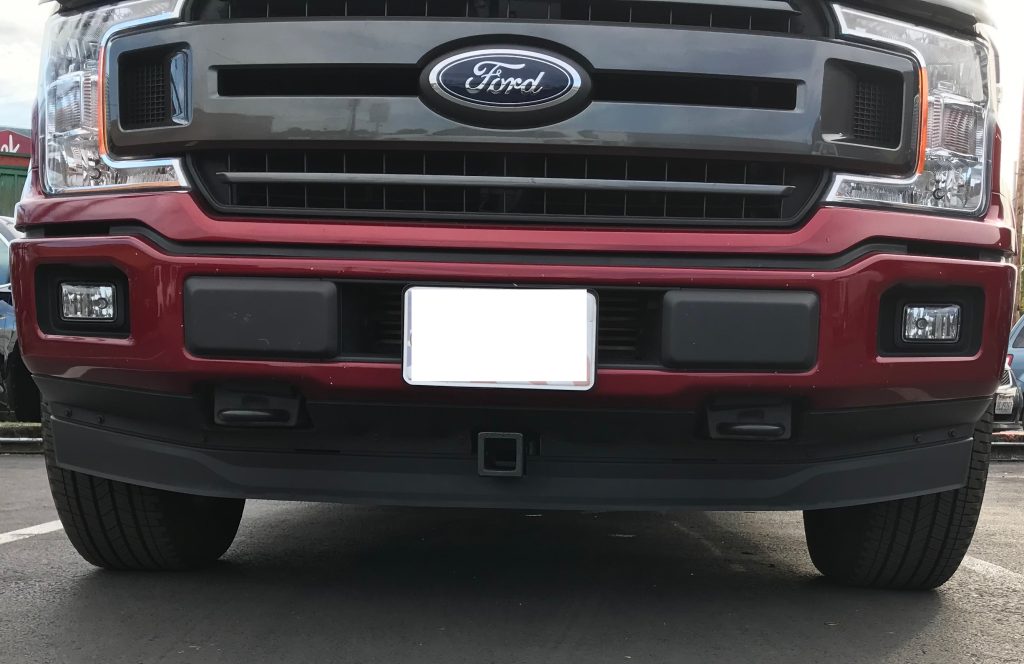
Important Installation Notes
Always refer to the official Torklift instructions when installing products, as they are updated regularly. The installation process outlined here is meant as a visual reference guide.
Frequently Asked Questions
What is the part number for the F-150 front hitch?
The Torklift NorthHitch for 2016-2025 Ford F-150 models is part number X7913S.
What can I attach to a front-mounted hitch?
You can attach anything from a snowplow to a bike rack, significantly increasing your truck's versatility.
Do I need to remove the active air dam?
If your F-150 is equipped with an active front air dam, yes, you will need to remove it. The blade assembly component will not be reinstalled and is not required for operation of the truck.
What is the torque specification for the hitch hardware?
All hardware should be torqued to 75 ft-lb once all installation steps are complete.
Does the NorthHitch come with a warranty?
Yes, the Torklift NorthHitch X7913S is made in the USA and comes with a lifetime warranty.
Where can I get help if I have questions during installation?
For any questions, visit the Torklift website or call 800-246-8132.
Will removing the air dam affect my truck's operation?
No, the active air dam blade assembly is not required for operation of the truck.