


Installation Disclaimer: This blog is intended as a general reference only. It may not include every step, tool, torque specification, or vehicle-specific detail needed for your installation. Always refer to the official installation instructions included with your product for the complete procedure, required tools, torque values, safety information, and fitment details.
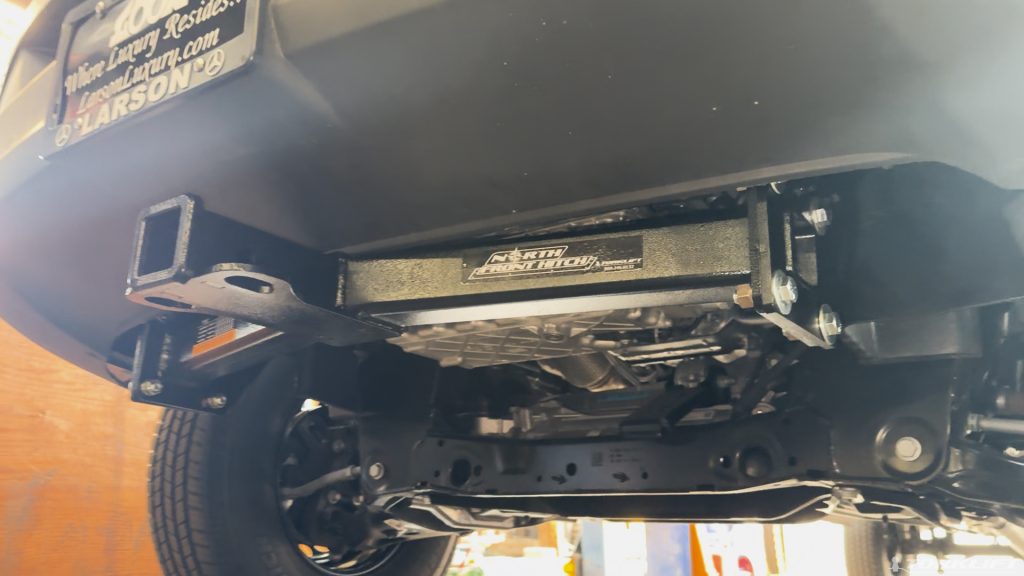
The Torklift North Hitch (part number X7923S) transforms your Mercedes Sprinter into a more versatile workhorse. This front-mounted hitch opens up new possibilities for your vehicle, from attaching snow plows to mounting bike racks and everything in between.
Why Choose the Torklift North Hitch
Built from stainless steel and finished with a powder coating, this hitch is engineered to withstand harsh conditions and demanding adventures. It's made in the USA and backed by a lifetime warranty, giving you confidence in its durability and performance.
One of the standout features of this hitch is its straightforward installation process. Unlike many front hitch systems, the Torklift North Hitch requires no bumper removal, saving you time and hassle during installation.
What You'll Need
Before beginning the installation, gather the following hardware components that come with your hitch:
- M12 bolts (for rock guard removal)
- Half inch by two inch bolts
- Half inch by one and a half inch bolts
- Internal tooth lock washers
- M12 lock washers
- Half inch lock washers
- M12 flat washers
- Half inch flat washers
- 1x2 spacers
- Nuts
- Bolt fisher tool
- Razor knife
- 3/4 socket
- 3/4 wrench
Step-by-Step Installation Process
Step 1: Remove the Rock Guard
Start by removing the six M12 bolts that secure the rock guard to the Sprinter's frame. You'll find these bolts distributed as follows:
- Two bolts on each side of the frame
- One bolt coming up on each side
Step 2: Prepare the Bumper
Before hanging the side plates, use a razor knife to trim a very small section on the inside edge of the bumper. This minor modification ensures proper fitment of the hitch components.
Step 3: Prepare the Bolt Fisher Assembly
Assemble your bolt fisher by threading the following components onto a half inch by two inch bolt:
- Internal tooth lock washer
- 1x2 spacer
Feed the bolt head into the large hole in the frame, followed by the washer and the 1x2 plate washer. Pull both components back down through the frame.
Step 4: Install the Passenger Side Plate
For the passenger side installation, assemble the following hardware on an M12 bolt:
- Lock washer
- M12 flat washer
- Half inch flat washer
Insert this assembly up through the bottom of the side plate and into the bottom of the frame. Pull the bolt fisher through the rear hole and down through the side plate. Secure it with a half inch washer, lock washer, and nut.
Step 5: Install the Driver Side Plate
Repeat the exact same process from Step 4 on the driver's side of the vehicle.
Step 6: Attach the Cross Tube
Hang the cross tube off the side plates using half inch by one and a half inch bolts. Each of the eight bolts requires:
- Half inch washer
- Half inch lock washer
- Nut
Leave these bolts loose for now to allow for adjustment.
Step 7: Install the Side Support Straps
Install one side support strap per side of the hitch. Each strap connects to the side bolt in the frame and passes through the last hole in the side plate.
Step 8: Tighten All Hardware
Follow this specific tightening sequence for optimal results:
- First: Tighten all eight side plate to cross tube bolts using a 3/4 socket with a 3/4 wrench
- Second: Tighten the two bolts coming down through each side plate using the same 3/4 socket
- Finally: Tighten the last two bolts on each side for the side straps
Installation Complete
Your Torklift North Hitch is now installed and ready to expand your Sprinter's capabilities. Whether you're preparing for winter weather with a snow plow attachment or gearing up for a weekend adventure with a bike rack, your front hitch is ready to perform.
Important Reminders
Remember that Torklift installation instructions are updated regularly to reflect the latest best practices and product improvements. Always consult the official instructions included with your product for the most current information.
Frequently Asked Questions
What is the part number for the Torklift North Hitch for Mercedes Sprinter?
Do I need to remove my bumper to install this hitch?
No. One of the key advantages of the Torklift North Hitch is that it features an easy installation process with no bumper removal needed.
What materials is this hitch made from?
The hitch is built from stainless steel and is powder coated for durability and corrosion resistance.
Does this hitch come with a warranty?
Yes, the Torklift North Hitch is made in the USA and comes with a lifetime warranty.
What can I attach to this front hitch?
This front-mounted hitch increases your vehicle's capabilities by allowing you to attach anything from a snow plow to a bike rack.
What size socket do I need for tightening the bolts?
You'll need a 3/4 socket and a 3/4 wrench for the final tightening steps.
How many side support straps are included?
There is one support strap per side of the hitch, for a total of two straps.
Where can I get help if I have questions during installation?
For any questions, visit the Torklift website or call (800) 246-8132.