


Installation Disclaimer: This blog is intended as a general reference only. It may not include every step, tool, torque specification, or vehicle-specific detail needed for your installation. Always refer to the official installation instructions included with your product for the complete procedure, required tools, torque values, safety information, and fitment details.
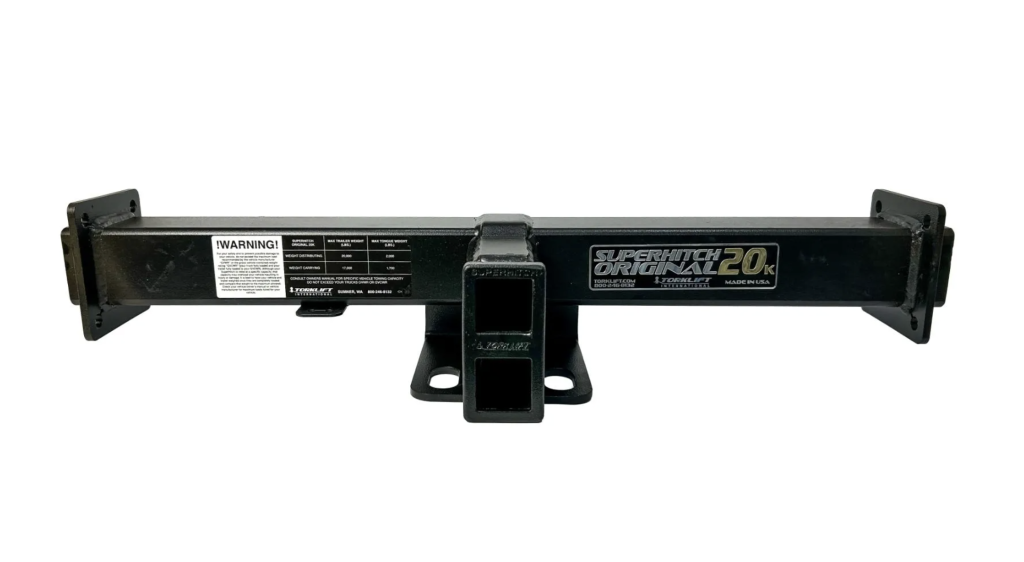
The Torklift SuperHitch F1002 is a robust 30,000-pound capacity hitch designed specifically for Ford trucks. Installing this heavy-duty hitch requires careful attention to detail and proper technique. This guide walks you through the complete installation process to help you upgrade your truck's towing capabilities.
Before You Begin
Having a second person available during installation is highly recommended. The factory hitch can be heavy and awkward to handle, especially when removing the final bolts. Proper assistance ensures safety and makes the job significantly easier.
Initial Preparation Steps
Start by loosening your spare tire. While this step isn't always necessary, it provides better access to the work area and makes the installation process smoother.
If your truck is equipped with a vibration damper, remove it before beginning the hitch installation. Don't worry about losing this component. You'll reinstall the vibration damper on the SuperHitch later in the process.
Removing Your Factory Hitch
Locate the mounting bolts securing your factory hitch. You'll find four bolts on each side of the hitch, totaling eight bolts that need removal.
Begin removing these bolts systematically, but leave a couple partially installed until you have help securing the hitch. Once your assistant is in position to support the weight, remove the remaining bolts completely. The hitch will come off the truck entirely at this point.
Installing the SuperHitch Plates
With the factory hitch removed, you'll use the provided hardware to replace the original bolt locations. This hardware will secure the SuperHitch plates to your truck's frame.
Here's a helpful technique that simplifies the plate installation process:
Start by installing just a single nut on each bolt location without any additional hardware. This initial nut secures the plate loosely to the frame, creating a stable foundation for the remaining components.
Once the plates are held in place by these initial nuts, you can easily add the flat washers, additional nuts, and remaining plates. This method prevents the frustration of trying to align multiple components simultaneously.
After installing all the hardware on the bolts, leave everything hand tight for now. This allows for adjustment when you're ready to attach the SuperHitch cross tube to the plates.
Mounting the SuperHitch Cross Tube
Position the SuperHitch cross tube and align both ends with the mounted plates. The hand-tight bolts give you the flexibility to make minor adjustments for proper alignment.
Once both ends of the cross tube are properly positioned, secure it to the plates using the appropriate hardware provided in your kit. Torque these connections down to the proper specifications outlined in your installation instructions.
Final Torquing and Wire Management
With the plates and SuperHitch securely fastened together, return to the frame mounting bolts. Torque these bolts down to the proper specifications as detailed in your installation manual. Proper torque values are critical for safe operation and maximum load capacity.
As a finishing touch, consider securing any loose wires to the plate. This simple step prevents wires from bouncing around while driving, reducing wear and potential damage over time.
Installation Complete
Once all components are properly torqued and secured, you've successfully installed your 30,000-pound capacity SuperHitch on your Ford truck. Take a moment to inspect all connections and ensure everything is tight and properly aligned.
If you removed a vibration damper at the beginning of the installation, now is the time to reinstall it on your new SuperHitch.
Important Reminders
This guide provides a visual reference for the installation process. Always refer to the official Torklift instructions when installing any Torklift product, as these instructions are updated regularly to reflect the latest specifications and procedures.
Frequently Asked Questions
Do I need to remove my spare tire to install the F1002 SuperHitch?
You don't need to remove the spare tire completely, but loosening it provides better access to the work area and makes installation easier.
Can I install the SuperHitch F1002 by myself?
While it's technically possible, having a second person is highly recommended. The factory hitch becomes heavy and difficult to control when removing the final bolts, and assistance makes the job safer and more manageable.
What happens to my vibration damper during installation?
If your truck has a vibration damper, remove it before starting the installation. You'll reinstall it on the SuperHitch after completing the main installation.
Why should I leave the bolts hand tight initially?
Leaving the frame bolts hand tight allows you to adjust the plates for proper alignment with the SuperHitch cross tube. Once everything is aligned and the cross tube is secured, you can torque the frame bolts to specification.
What is the towing capacity of the SuperHitch F1002?
The SuperHitch F1002 has a 30,000-pound capacity, significantly upgrading your Ford's towing capabilities.
Where can I find the proper torque specifications?
All torque specifications are included in the official installation instructions that come with your SuperHitch. Always refer to these instructions for the most current and accurate information.
Who can I contact if I have questions during installation?
For any questions, visit torklift.com or call 800-246-8132 for expert assistance.