


Installation Disclaimer: This blog is intended as a general reference only. It may not include every step, tool, torque specification, or vehicle-specific detail needed for your installation. Always refer to the official installation instructions included with your product for the complete procedure, required tools, torque values, safety information, and fitment details.
Why Upgrade to the SuperHitch Magnum?
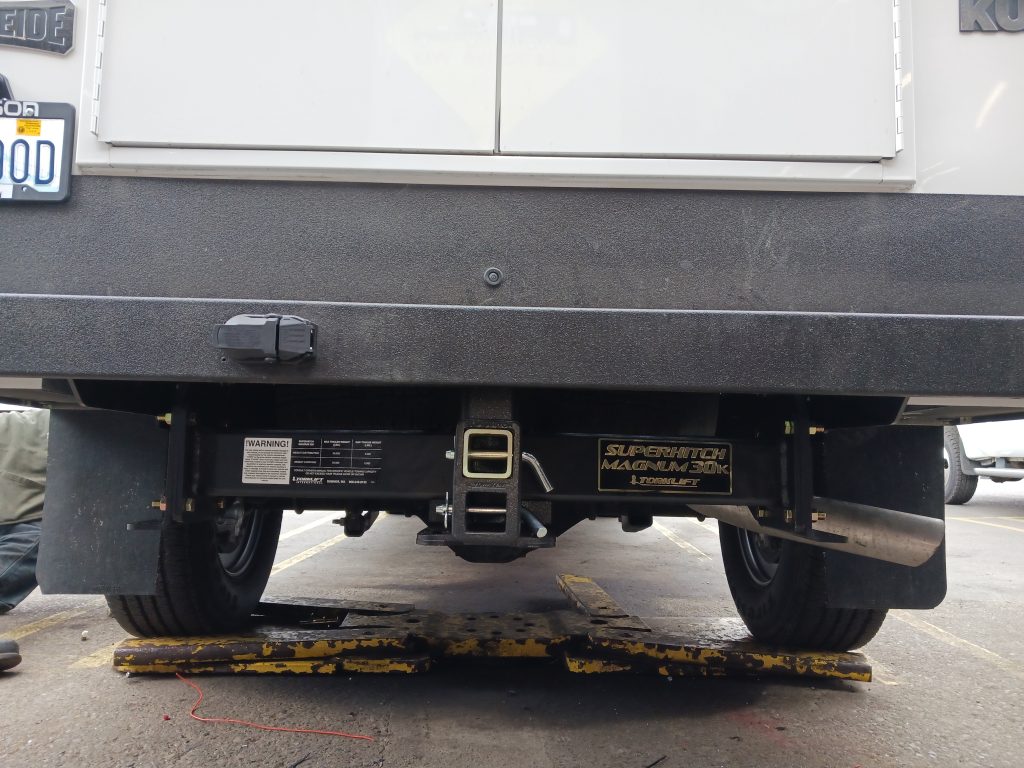
The Torklift D1111-30 SuperHitch Magnum transforms your Ram 3500 into an even more capable workhorse. This American-made hitch delivers serious performance with a 3,000 pound tongue weight capacity and 30,000 pound towing capacity. Built with a powder-coated finish and backed by a lifetime warranty, it's engineered to handle the toughest jobs while lasting for years to come.
Preparation and Initial Removal
Before you begin the installation, lower your spare tire to create working space. This gives you better access to the rear bumper area and prevents any interference during the process.
Start by disconnecting the wiring harness connectors on the rear bumper. Next, remove the license plate from the bumper and take out the hardware located behind it. This hardware secures the bumper to the factory hitch.
Remove the four bolts on each side that hold the rear bumper to the factory hitch. If your Ram 3500 is equipped with a rear bumper step, remove that component as well at this stage.
Removing the Factory Hitch
With the bumper hardware removed, proceed to remove all the bolts holding the factory hitch to the frame rails. You'll also need to remove the rear four bolts located within the frame rails that hold the truck bed to the frame.
The next steps vary depending on whether you have a short bed or long bed configuration. For long bed models, loosen the front two bolts holding the truck bed to the frame on each side. It's critical that you do not completely remove these forwardmost bolts.
Once all the hardware is removed or loosened, use a jack or board of wood to carefully raise the rear of the truck bed. Take care not to hit the cab during this process. With the bed raised, remove the factory hitch by lifting and sliding it rearward off the truck frame.
Preparing the Frame
On each side of the frame, align one flat washer with the outermost rear hole on the frame rail where the truck bed is bolted. Reinstall and tighten all the hardware to secure the bed back in position.
Installing Hardware with the Bolt Fisher
Insert the end of a bolt fisher into the front hole of the frame, labeled hole C in the instructions, and guide it through hole B. Attach a 1 by 2 plate washer, star washer, and bolt to the bolt fisher.
Pull the end of the fisher until the bolt completely protrudes from hole C, then remove the fisher. Drop a 2 by 2 plate washer, star washer, and bolt through the large hole in the frame and out hole A. Repeat this entire process on the opposite side of the truck.
Mounting the Side Bumper Brackets
Align the side bumper bracket with the four holes on the outer side of the frame rail. The flange side of the bracket must be pointed toward the outside of the truck. This orientation is essential for proper fitment.
Insert a bolt and flat washer through the bracket and frame for each hole. Place the inner side strap onto the protruding ends of the bolt. Secure each bolt with a washer, lock washer, and nut, but leave the hardware hand tight for now. Repeat this process on the opposite side of the truck.
Installing the SuperHitch Cross Tube
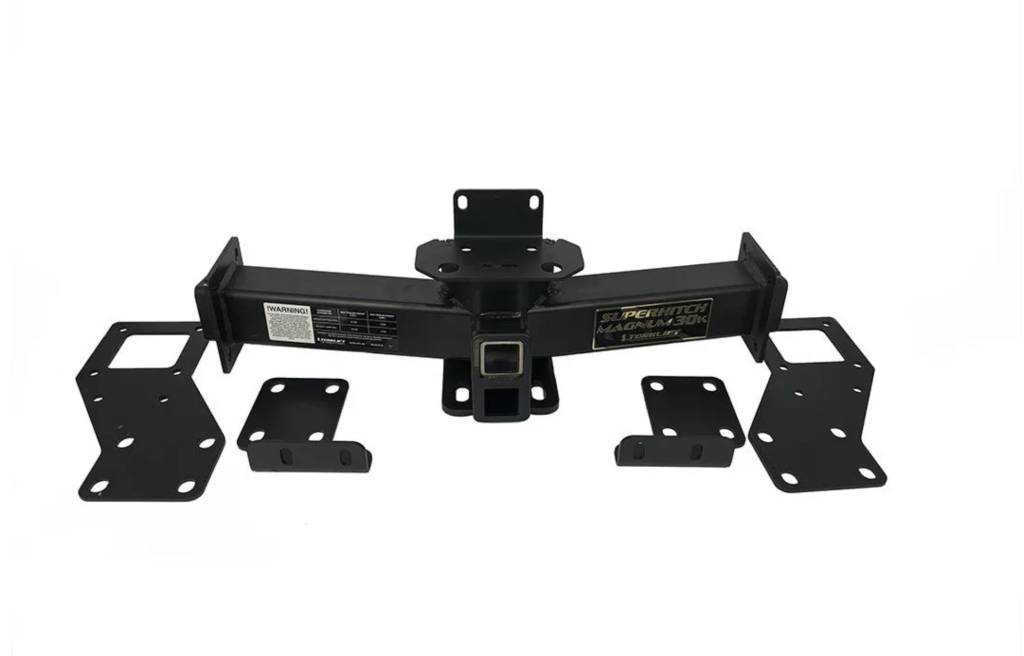
Raise up the SuperHitch cross tube and place one end into the square cutout on the side strap. Insert a bolt into one of the holes, then lift up and insert the other side of the crosstube into the other side strap. Place a bolt into one of the holes on this side as well.
Install the side plates onto the previously installed bolts. Secure each bolt with a washer, lock washer, and nut. Insert and secure the remaining hardware on the crosstube.
Insert a bolt into each hole on the inner side straps and through the side plates. Secure them with a lock washer and nut.
Torque Sequence
Proper torque sequence ensures the hitch is securely mounted and performs as designed. Follow this specific order:
- First, torque the crosstube to the side plates
- Then torque the inner side straps to the side plate bolts
- Next, torque the side plates to the frame rails
- Finally, torque the inner side straps and side bumper brackets to the frame rails
Reinstalling the Rear Bumper
Reinstall the rear bumper over the SuperHitch. Make sure all the holes and tabs are aligned and fully seated with the hitch. Proper alignment is critical for both appearance and function.
Insert a bolt and flat washer into each vertical slot on the hitch and through the rear bumper. Secure the bolt with a lock washer, flat washer, and nut.
Finally, reinstall the license plate and reconnect the wiring harnesses. Your installation is now complete.
Important Reminders
This guide provides a visual reference for the installation process. Always refer to the official Torklift instructions when installing their products, as they are updated regularly to reflect the latest specifications and procedures.
The SuperHitch Magnum represents a significant upgrade in towing capability for your Ram 3500, and proper installation ensures you can safely take advantage of its 3,000 pound tongue weight and 30,000 pound towing capacity.
Frequently Asked Questions
What is the towing capacity of the Torklift D1111-30 SuperHitch Magnum?
The SuperHitch Magnum offers a 30,000 pound towing capacity with a 3,000 pound tongue weight rating.
Is the SuperHitch Magnum made in the USA?
Yes, the Torklift D1111-30 SuperHitch Magnum is proudly made in the USA.
What kind of warranty does the SuperHitch Magnum come with?
The hitch is backed by a lifetime warranty.
Do I need to remove the spare tire during installation?
You need to lower the spare tire to create working space, but complete removal is not specified.
Is the installation different for short bed and long bed Ram 3500 trucks?
Yes, the process differs between short bed and long bed configurations, particularly when loosening the truck bed bolts.
Do I need to completely remove the front truck bed bolts?
No, you should loosen the front two bolts holding the truck bed to the frame on each side, but do not completely remove the forwardmost bolts.
What should I do if I have questions during installation?
For any questions, visit the Torklift website or call (800)246-8132.
Is this guide sufficient for installation, or do I need additional instructions?
This guide is for visual reference only. Always refer to the official Torklift instructions when installing their products, as they are updated regularly.