


Installation Disclaimer: This blog is intended as a general reference only. It may not include every step, tool, torque specification, or vehicle-specific detail needed for your installation. Always refer to the official installation instructions included with your product for the complete procedure, required tools, torque values, safety information, and fitment details.
What Are Torklift Apex Anchors?
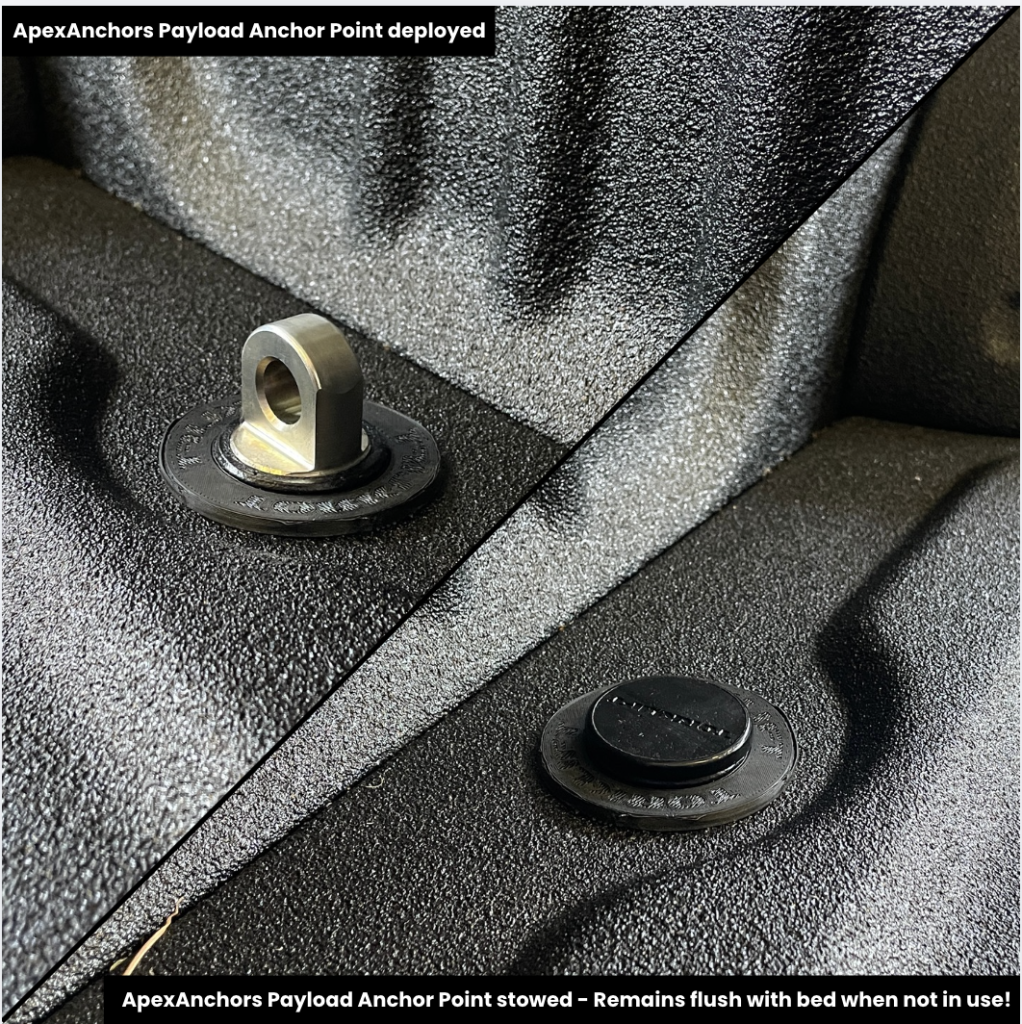
The Torklift Apex anchor (part number F6001) is an in-bed camper tie-down system designed specifically for the Ford F-150. These anchors bolt directly to your truck's frame and pop up out of the bed when needed. When not in use, they're completely concealable, giving you a clean truck bed appearance. This design provides the strongest mounting option possible for your slide-in camper.
Tools and Materials You'll Need
Based on the installation process, you'll need:
- 9/16 socket
- Fish wire
- 6-inch long 1/4-inch drill bit (supplied)
- 2-inch hole saw
- Standard drill
- Wrenches for holding nuts
Hardware included:
- 1/2-inch bolts
- 3/8-inch bolts
- Internal tooth lock washers
- 1x2 plate washers
- 1x2 spacer
- Flat washers
- Lock washers
- Flange nuts
- Nuts
Step 1: Prepare the Frame Bolts
Start by preparing two 1/2-inch bolts with the necessary washers. Add internal tooth lock washers and 1x2 plate washers to each bolt. These will be fished through the frame in the next step.
Step 2: Fish Bolts Through the Frame
Feed your fish wire through the large hole in the frame and out through the small upper hole. Attach your prepared bolt to the fish wire and pull it out through the frame. Repeat this process for the second frame mount bolt.
Step 3: Install the Bed Hat Crossmember Bolt
Take one more 1/2-inch bolt with an internal tooth lock washer and a 1x2 spacer. Insert this bolt through the inner end of the bed hat crossmember into the hole towards the side of the truck.
Step 4: Mount the Frame Mount Plate
Position the frame mount plate and secure it using the three bolts:
- The two bolts you fished through the frame
- The one bolt going up through the bottom of the bed hat crossmember
Finish each of the three bolts with a 1/2-inch flat washer, lock washer, and nut.
Step 5: Prepare for Vertical Support Plate Installation
Loosen the leaf spring hanger bolt until there's approximately a 15/16-inch gap. This creates the space needed to install the vertical support plate. You'll need to hold the nut on the back side of the bolt while loosening it.
Step 6: Install the Vertical Support Plate
When mounting the vertical support plate, ensure it sits behind the upper tie-down plate. Push it up as far as it will go on the bolt. Use a 1/2-inch bolt to support the plate while you tighten all the hardware.
Step 7: Tighten the Main Receiver Bolts
Tighten all bolts for the main receiver in this order:
- Start with the vertical bolt first
- Retighten the leaf spring hanger bolt while pushing up as far as possible to ensure the bolt bottoms out
- Finish by tightening the last two 1/2-inch bolts
Step 8: Mount and Use the Drill Template
Attach the drill template using two 3/8-inch bolts. Using your 9/16 socket, tighten the drill template while pushing up so it sits flush against the bottom of the bed.
Using the supplied 6-inch long 1/4-inch drill bit, drill up through the drill template and through the bottom of the bed.
Step 9: Create the Main Opening
Remove the drill template using your 9/16 socket. Using the quarter-inch pilot hole as a guide, drill up through the bottom of the bed using a 2-inch hole saw.
Step 10: Install the Bed Skirt
From the top side of the bed, insert the skirt with the tabs facing front to back of the truck. Make sure the tabs lock into the bottom edge of the truck bed.
Step 11: Attach the Receiver
Using four 3/8-inch bolts with flat washers and flange nuts, install the receiver to the frame mount. Be careful not to push the bed skirt up through the bottom of the bed during this step.
Using a 9/16 socket, tighten up the receiver while pushing up all the way.
Step 12: Test Your Installation
Once installed, simply pull up on the insert and twist to lock it into position. Your Apex anchors are now ready for your next adventure.
Important Installation Notes
- Always push components up as far as possible when tightening to ensure proper seating
- The vertical support plate must be positioned behind the upper tie-down plate
- The bed skirt tabs must face front to back of the truck for proper installation
- Don't allow the bed skirt to push up through the bed opening during receiver installation
Frequently Asked Questions
What Ford F-150 models are compatible with the Torklift Apex anchors?
The part number F6001 is designed for Ford F-150 trucks. For specific year and model compatibility, contact Torklift at (800) 246-8132 or visit their website.
Can I install Apex anchors myself?
Yes, this is a DIY-friendly installation if you have basic mechanical skills and the proper tools. However, always refer to the official installation instructions included with your product, as they are updated regularly.
How do the Apex anchors stay concealed when not in use?
The anchors pop up out of the bed when needed and can be lowered and concealed when not in use, maintaining a clean truck bed appearance.
Why do Apex anchors provide the strongest mounting option?
These tie-downs bolt directly to your truck's frame rather than just the bed, providing maximum strength and stability for your slide-in camper.
What if I have questions during installation?
For any questions, visit the Torklift website or call (800) 246-8132 for assistance.
Do I need to drill through my truck bed?
Yes, the installation requires drilling a 2-inch hole through the bed using the supplied drill bit and template for precise placement.