


Installation Disclaimer: This blog is intended as a general reference only. It may not include every step, tool, torque specification, or vehicle-specific detail needed for your installation. Always refer to the official installation instructions included with your product for the complete procedure, required tools, torque values, safety information, and fitment details.
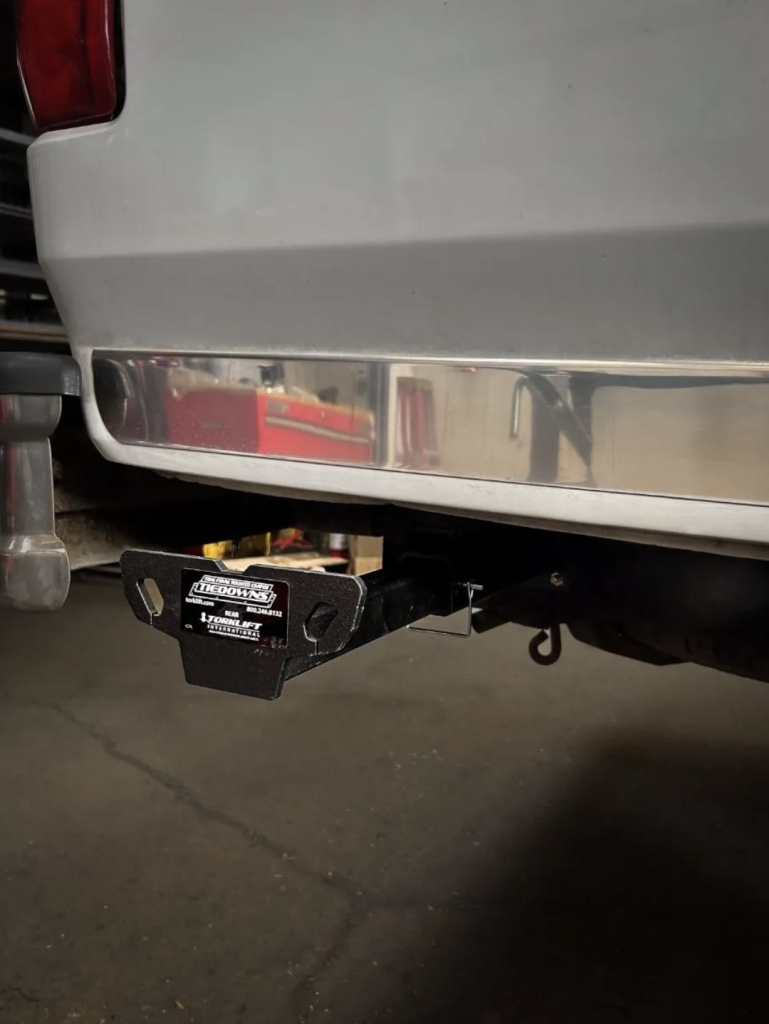
When it comes to securing your truck camper, the Torklift R3501 rear tie-downs offer a reliable, American-made solution designed specifically for Ford F-350 trucks. These tie-downs attach directly to your factory trailer hitch and provide the strength and durability you need for safe travels with your camper.
Why Choose Torklift R3501 Tie-Downs
The R3501 tie-downs are built with quality and longevity in mind. Made in the USA and backed by a lifetime warranty, these powdercoated tie-downs are engineered to withstand the rigors of the road while maintaining their appearance and functionality.
One of the standout features of these tie-downs is their versatility. They're designed as a no-drill bolt-on option when used with Torklift's Super Hitch, and newer Ford trucks already have pre-existing bolt holes that make installation straightforward.
Understanding Your Installation Type
Before you begin, it's important to know that most installations of the R3501 tie-downs are direct bolt-on applications. Drilling is not common for this product. However, if you're working with an older Ford truck equipped with an aftermarket hitch, you may need to drill mounting holes.
Here's what to expect based on your setup:
- Torklift Super Hitch owners: No drilling required
- Newer Ford F-350 trucks: Pre-existing bolt holes available
- Older trucks with aftermarket hitches: May require drilling
Installation Process
Step 1: Position the Tie-Down Frame
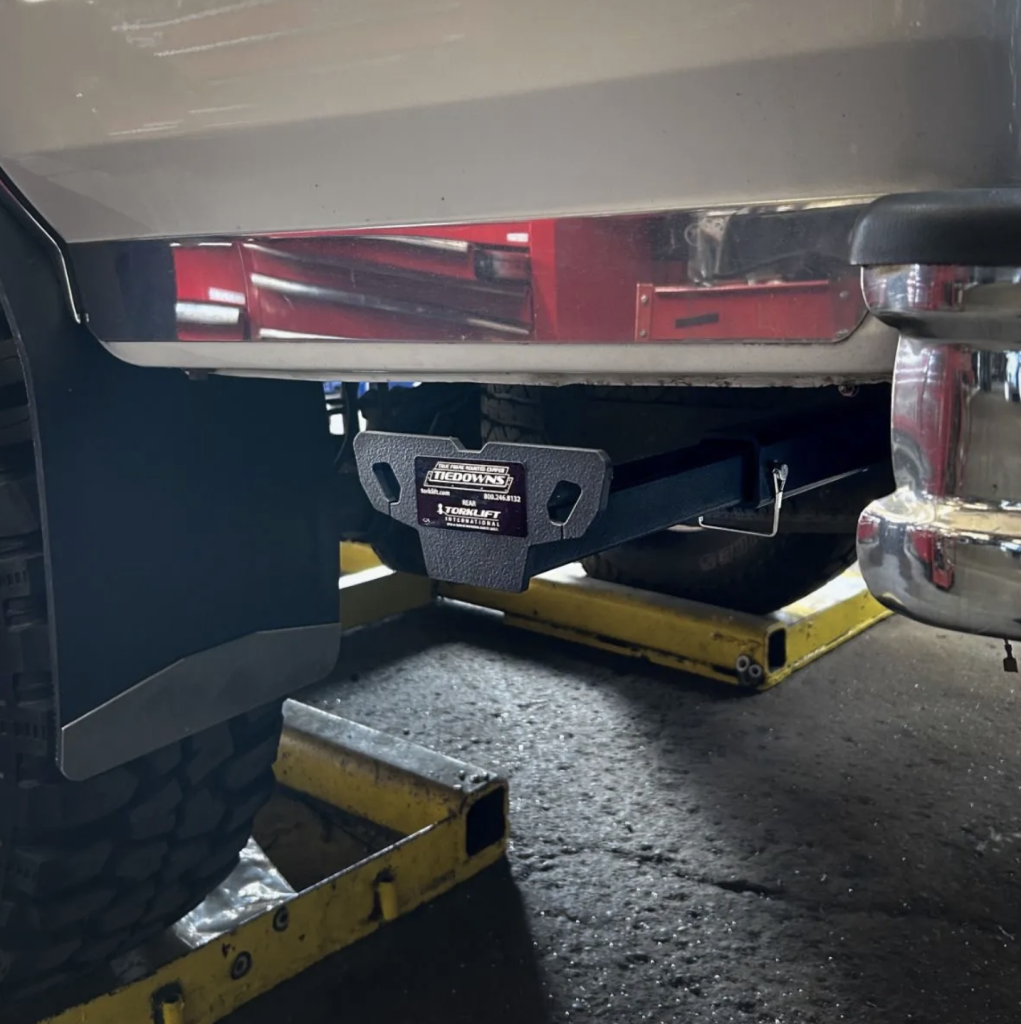
Start by placing the tie-down frame unit up against your hitch's side plate. Position the unit as far back towards the rear of the truck as possible. This placement ensures optimal performance and proper camper support.
Step 2: Mark Drilling Points (If Applicable)
If your setup requires drilling, use a paint pen or marker to mark all four holes that will need to be drilled. Take your time with this step to ensure accurate placement.
Step 3: Drill the Mounting Holes
Remove the frame unit and drill out the marked holes to 7/16 inch. Remember, this step only applies to older trucks with aftermarket hitches.
Step 4: Install the Bolts
Place your frame unit back up against the hitch side plate. Install a 1 3/8 inch x 1/2 inch grade 8 bolt through each hole. You can install these bolts from the inside out or vice versa, depending on whatever is easiest for your particular setup.
Step 5: Add Washers and Nuts
Once the bolts are installed, add the following hardware in this order:
- 1 3/8 inch flat washer
- One lock washer
- 1 3/8 inch nut
Step 6: Torque to Specification
Torque all hardware to 40 ft-lb. This torque specification is critical for ensuring a secure, safe installation.
Step 7: Repeat for the Opposite Side
Complete the same installation process on the opposite side of your truck.
Step 8: Install the Tie-Down Insert
Install the tie-down insert and secure it using the provided 1/4 inch pins. With this final step, your Torklift R3501 tie-down installation is complete.
Hardware Summary
| Component | Specification |
|---|---|
| Bolts | 1 3/8 in x 1/2 in grade 8 |
| Flat Washer | 1 3/8 in |
| Lock Washer | 1 3/8 in |
| Nut | 1 3/8 in |
| Securing Pins | 1/4 in |
| Drill Bit Size | 7/16 in (if drilling required) |
| Torque Specification | 40 ft-lb |
Important Reminders
Always refer to the official Torklift instructions when installing these products, as they are updated regularly to reflect the most current installation procedures and specifications. The installation process outlined here serves as a visual reference guide, but your specific application may have unique requirements.
Get Support When You Need It
If you have questions during your installation or need clarification on any step, Torklift's support team is available to help. Visit the Torklift website or call 800-246-8132 for assistance.
Frequently Asked Questions
Do I need to drill holes to install the R3501 tie-downs?
In most cases, no. The R3501 tie-downs are designed as a no-drill bolt-on option for trucks with Torklift's Super Hitch, and newer Ford trucks already have pre-existing bolt holes. Drilling is only necessary for older Ford trucks with aftermarket hitches.
What torque specification should I use for the mounting hardware?
All hardware should be torqued to 40 ft-lb.
Are these tie-downs covered by a warranty?
Yes, Torklift R3501 tie-downs are backed by a lifetime warranty.
Where are these tie-downs manufactured?
The R3501 tie-downs are made in the USA.
Can I install the bolts from either direction?
Yes, you can install the bolts from the inside out or vice versa, depending on whatever is easiest for your particular installation.
What size drill bit do I need if drilling is required?
If drilling is necessary, use a 7/16 inch drill bit.
How do I contact Torklift if I have installation questions?
You can visit the Torklift website or call 800-246-8132 for support.