


Installation Disclaimer: This blog is intended as a general reference only. It may not include every step, tool, torque specification, or vehicle-specific detail needed for your installation. Always refer to the official installation instructions included with your product for the complete procedure, required tools, torque values, safety information, and fitment details.
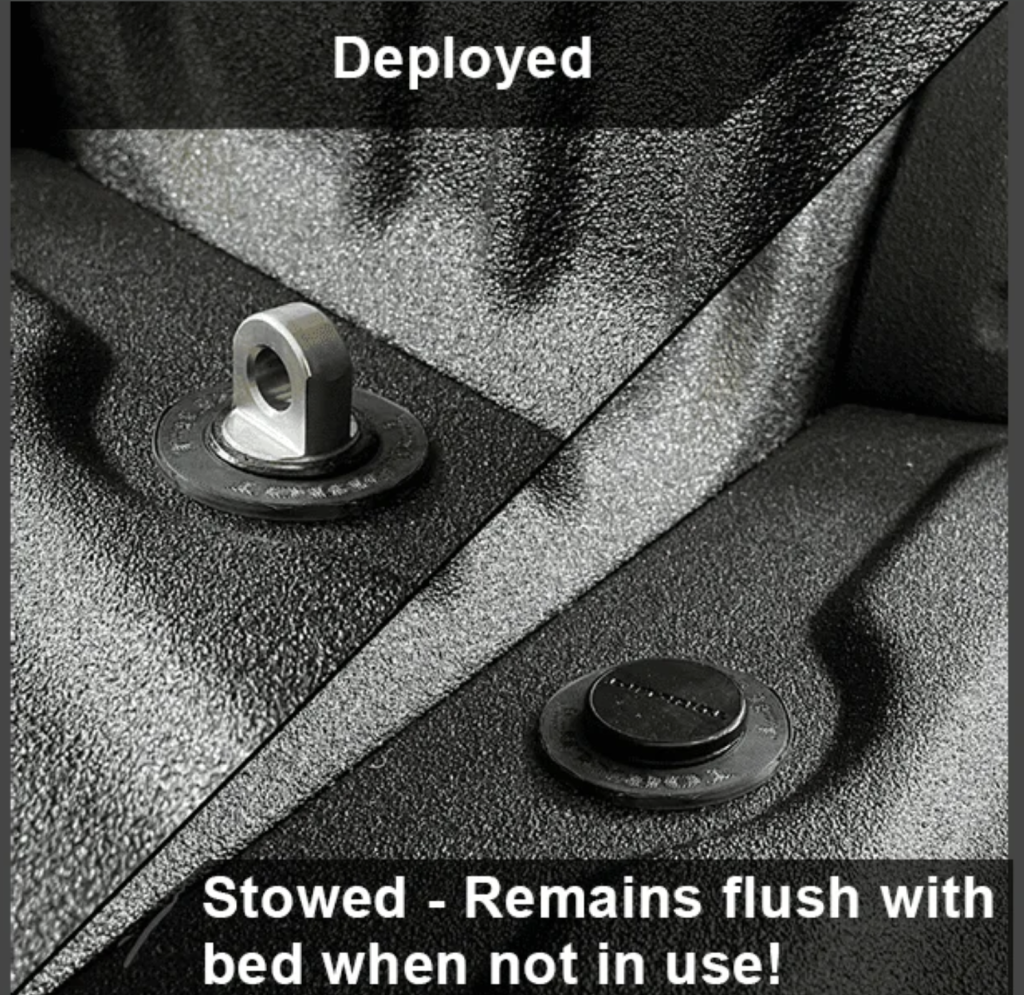
The Torklift ApexAnchor (part number F5007) represents the strongest mounting option available for your slide-in camper. These innovative in-bed camper tie downs bolt directly to your Ford F350's frame and pop up through the bed when needed. When not in use, they conceal completely, maintaining your truck bed's clean appearance.
What Makes ApexAnchors Different
Unlike surface-mounted tie downs, ApexAnchors integrate directly with your truck's frame structure. This frame-direct mounting provides superior strength and stability for securing heavy camper loads. The pop-up design means you get maximum holding power without sacrificing bed space or functionality when you're not hauling a camper.
Preparing for Installation
Before beginning, gather your tools and hardware. The installation requires drilling through your truck bed, so take your time and follow each step carefully. You'll be working with 1/2-inch bolts, various washers and spacers, and drilling equipment.
Step 1: Fish the Frame Bolts
Start by fishing two 1/2-inch bolts into the frame. The first bolt gets reverse-fished into the upper hole. The second bolt gets fished into the side of the frame. This fishing process positions the bolts inside the frame where you'll need them for mounting.
Step 2: Handle the Factory Step Brackets
If your truck has the factory flip-down step, loosen the two bolts securing it. You'll reuse these bolts during installation. If your truck doesn't have this step, use the supplied 5/16-inch bolts instead.
Here's a helpful tip: cover the frame opening with blue painter's tape. This simple trick prevents hardware from accidentally dropping into the frame during installation.
Step 3: Install Spacers and Retainers
Remove the bolt fisher from the bolt that drops through the bottom of the frame. Install a 1x2 spacer followed by the nylon retainer washer. This assembly holds everything in position as you continue the installation.
Step 4: Mount the Tie-Down
Take the driver side tie down and loosely hang it over the factory step bolts. Install the nuts loosely to hold it in place. Don't fully tighten anything yet, as you'll need adjustment room.
Install a 1/2-inch flange nut on the bolt going down. Then mount the two 1/2-inch bolts that will hold the support strap, finishing each with a 1/2-inch flange nut.
Complete this section by installing a flat washer, lock washer, and nut on the appropriate fasteners.
Step 5: Align and Tighten
Keeping the tie-down as straight as possible is critical. Push up on the assembly and tighten the step brackets while maintaining straight alignment. This ensures the anchor will pop up properly through the bed without binding.
Tighten the support strap bolts and the vertical bolt inside the frame.
Step 6: Install the Drill Guide
Loosely install the drill guide. Push it as high as possible, then snug it up so it stays in place. The drill guide ensures your hole placement is accurate.
Step 7: Drill the Pilot Hole
Using the supplied 1/4-inch drill bit, drill up through the drill guide and through the bottom of the bed. This pilot hole guides the larger hole saw in the next step.
Remove the drill guide once the pilot hole is complete.
Step 8: Cut the Main Opening
Using a 1 and 7/8-inch hole saw, drill down through the 1/4-inch pilot hole you just created. This larger hole allows the anchor to pass through the bed.
Step 9: Install the Skirt
Install the skirt around the opening, making sure the tabs run front to back of the vehicle. Proper tab orientation is important for the system to function correctly.
Step 10: Install the Receiver
The receiver may slide through the skirt more easily if you apply a small amount of WD-40 to the outer edge. Insert the receiver through the skirt.
Use the same 1/2-inch bolts you used for the drill template to mount the receiver. The receiver has considerable adjustment range, so start by pushing it all the way up. Then adjust it down until it comes through the bed to your preferred distance.
Tighten the two remaining bolts to secure the receiver at your chosen height.
Step 11: Test the Anchor
Once installed, pull up on the insert and twist to lock it into position. Your Apex Anchor should move smoothly and lock securely. When locked, it's ready to handle the demands of your camper.
Important Reminders
This installation guide provides a visual reference for the process. Always refer to the official instructions included with your Torklift products, as they are updated regularly with the latest specifications and procedures.
The installation process is similar for both driver and passenger sides, though you'll need to repeat the steps for each anchor point.
Frequently Asked Questions
What vehicles are the F5007 ApexAnchors designed for?
The F5007 ApexAnchors are designed for Ford F350 trucks and other Ford Super Duty models with compatible frame configurations.
Do I need the factory flip-down step for installation?
No. If your truck has the factory flip-down step, you'll reuse those bolts. If not, the kit includes 5/16-inch bolts to use instead.
What size drill bit do I need?
You'll need a 1/4-inch drill bit for the pilot hole and a 1 and 7/8-inch hole saw for the main opening. The 1/4-inch bit is supplied with the kit.
How do I know if the tie-down is straight during installation?
Keep checking alignment as you tighten the step brackets. The tie-down should sit perpendicular to the bed surface without any visible lean or twist.
Can I adjust the height of the anchor after installation?
The receiver has adjustment built in during installation. Push it all the way up initially, then adjust down to your preferred distance before final tightening.
How do I lock the anchor in the up position?
Simply pull up on the insert and twist to lock it into position. This secures it for use with your camper.
Which direction should the skirt tabs face?
The tabs should run front to back of the vehicle for proper installation.
Where can I get help if I have questions during installation?
Contact Torklift at 800-246-8132 or visit their website for installation support.