Installation Disclaimer: This blog is intended as a general reference only. It may not include every step, tool, torque specification, or vehicle-specific detail needed for your installation. Always refer to the official installation instructions included with your product for the complete procedure, required tools, torque values, safety information, and fitment details.
Understanding the Torklift R3504 Tie Down System
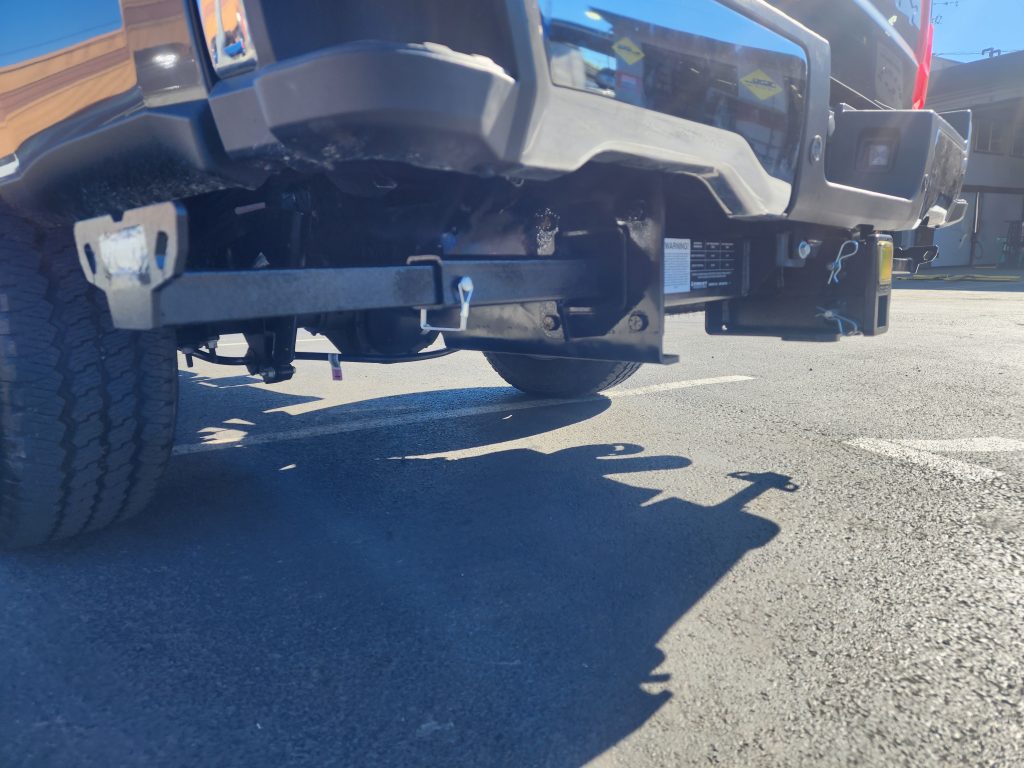
The Torklift R3504 frame mounted camper tie downs are specifically engineered to work with the Torklift SuperHitch. This is not an optional compatibility feature. These tie downs cannot be installed without the SuperHitch already in place on your vehicle.
By bolting directly to the SuperHitch, the R3504 tie downs create the strongest mounting option possible for your truck bed camper. This integrated design leverages the robust frame connection of the SuperHitch to provide maximum security for your camper.
What You'll Need
The R3504 kit includes:
- Tie down receivers
- 1/2-inch-13 x 2-inch hex bolts
- Lock washers
- Nuts
- Securing pins
Installation Process
Step 1: Locate the SuperHitch Mounting Points
Begin by identifying the bolts that attach the SuperHitch side plates to the cross tube. You'll be working with the two forward most bolts on each side.
Step 2: Remove Existing Hardware
Remove the two forward most nuts and lock washers from the SuperHitch cross tube. Keep these components nearby as you'll be reinstalling some of them.
Step 3: Replace the Bolts
One at a time, replace the two front bolts in the SuperHitch cross tube with the supplied 1/2-inch-13 x 2-inch hex bolts. Working one bolt at a time ensures the SuperHitch remains stable throughout the installation.
Step 4: Install the Tie Down Receiver
Slide the tie down receiver into the SuperHitch cross tube opening. Position it so it aligns properly with the bolt holes.
Step 5: Secure the Receiver
Reinstall the lock washers and nuts on the bolts. Make sure the bolt threads are pointing outward. Tighten all hardware to 90 ft-lb using a torque wrench.
Step 6: Insert the Tie Down
Insert the tie down into the receiver and secure it using the provided pin.
Step 7: Complete the Second Side
Repeat the entire process for the opposite side to complete the tie down installation.
Installation Complete
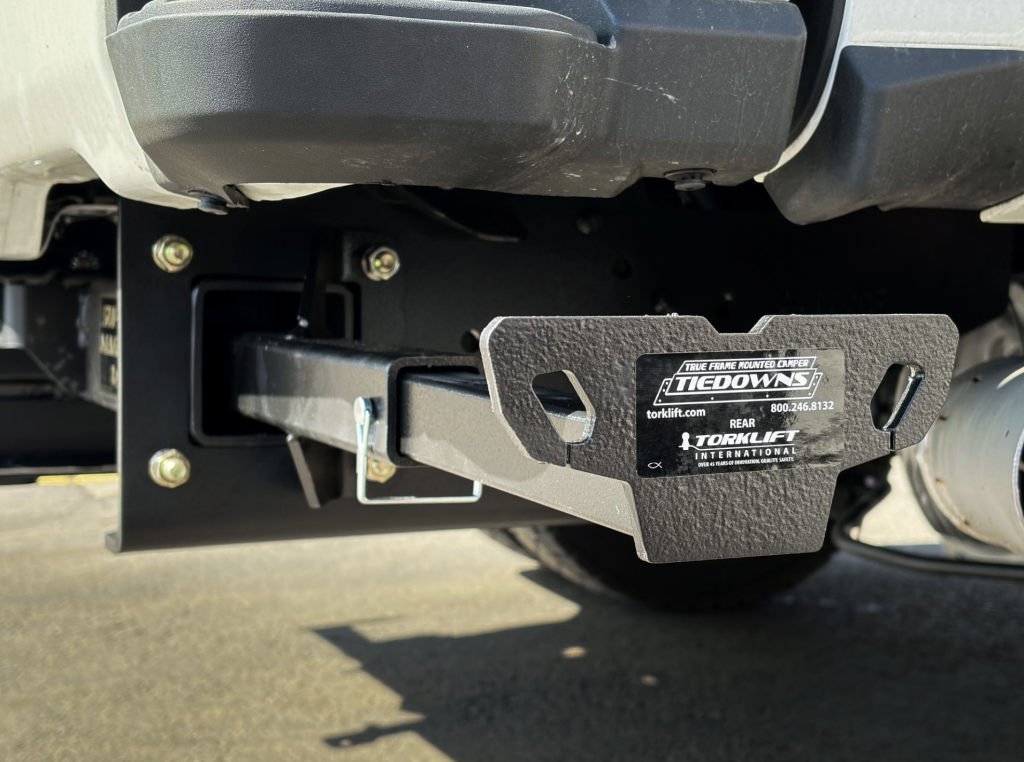
Once both sides are installed and properly torqued, your Torklift R3504 tie downs are ready to secure your truck camper.
Important Reminders
Always refer to the official Torklift instructions when installing their products, as these instructions are updated regularly to reflect the latest specifications and procedures.
The installation video serves as a visual overview guide, but the printed instructions included with your product should be your primary resource.
Frequently Asked Questions
Can I install the R3504 tie downs without a Torklift SuperHitch?
No. The R3504 is specifically designed to be compatible with the Torklift SuperHitch and cannot be installed without it.
What torque specification should I use for the mounting hardware?
Tighten all hardware to 90 ft-lb.
What size are the replacement bolts?
The kit includes 1/2-inch-13 x 2-inch hex bolts.
Do I need to remove all the SuperHitch bolts during installation?
No. You only need to work with the two forward most bolts on each side, and you should replace them one at a time.
Why is this considered the strongest mounting option?
Because the tie downs bolt directly to the SuperHitch, which is itself frame-mounted, creating an integrated system that maximizes strength and stability.
Where can I get help if I have questions during installation?
You can visit the Torklift website or call 800-246-8132 for assistance.