


Installation Disclaimer: This blog is intended as a general reference only. It may not include every step, tool, torque specification, or vehicle-specific detail needed for your installation. Always refer to the official installation instructions included with your product for the complete procedure, required tools, torque values, safety information, and fitment details.
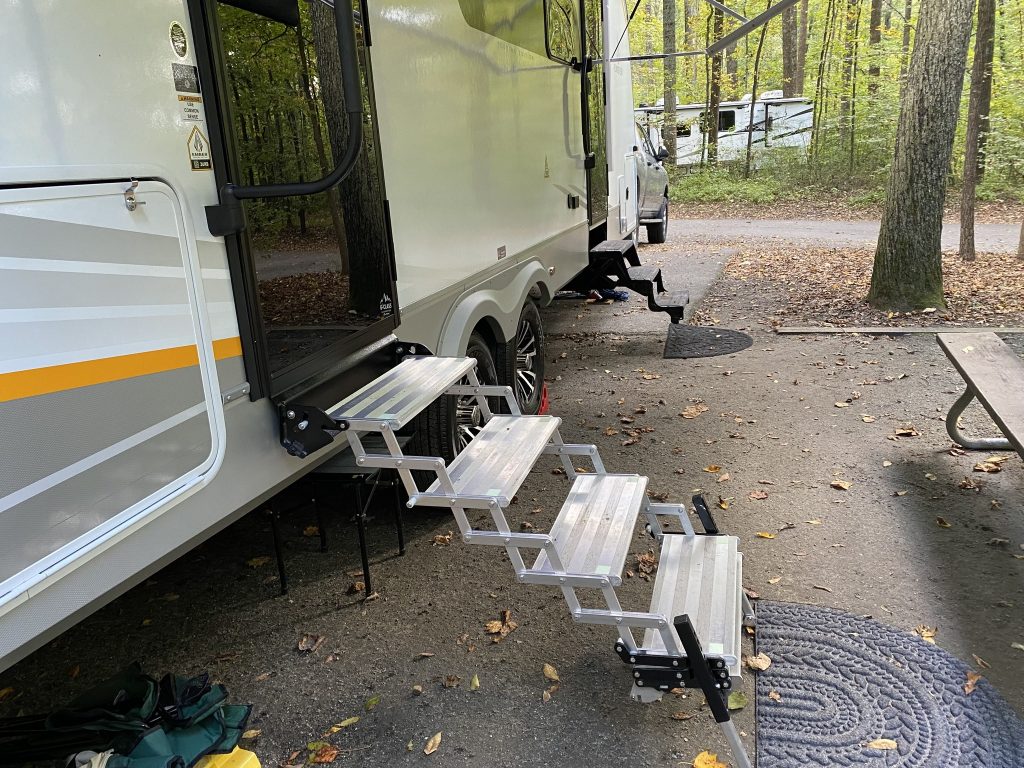
Installing the GlowStep Revolution Uprising steps on your RV is a straightforward process that can dramatically improve your entry and exit experience. This guide walks you through each step of the installation, helping you upgrade from your factory steps to a premium quick-disconnect system.
Before You Begin: Taking Measurements
The first critical step is taking accurate measurements of your RV doorway. This ensures you select the correct step configuration for your specific vehicle. If you're unsure about this process, Torklift offers a dedicated video on how to measure properly.
For reference, a four-step configuration is often the ideal choice for many RVs, but your specific needs may vary based on your measurements.
Step 1: Remove Your Factory Step
Begin by removing your existing factory step from your RV. Depending on your RV model, you may need to:
- Remove the threshold kick molding
- Modify decorative trim around the doorway
Not all RVs require these additional modifications. Assess your specific setup before proceeding.
Step 2: Position and Mark the Mounting Bracket
Place the mounting bracket in your RV doorway. Once properly positioned, mark the locations where you'll drill the mounting holes. Precision at this stage ensures a secure, properly aligned installation.
Step 3: Drill the Mounting Holes
Using a 7/32 drill bit, carefully drill the holes at the marked locations. Take your time to ensure the holes are straight and accurate.
Step 4: Secure the Mounting Bracket
Insert the low profile socket head screws into the door frame flange. Tighten these screws securely to ensure the mounting bracket is firmly attached to your RV.
Step 5: Attach the Step Assembly
The GlowStep Revolution Uprising features a quick-disconnect design that allows the step assembly to attach in seconds. This innovative feature makes storage and maintenance incredibly convenient.
Simply attach the step assembly to the installed mounting bracket.
Step 6: Adjust for Your RV Threshold
RV thresholds vary significantly in size from one model to another. To ensure a perfect fit:
Adjust the studs located on the inside of your mounting bracket. This customization allows the steps to accommodate your specific RV threshold dimensions.
Step 7: Test Door Operation
Before considering the installation complete, verify that your RV door can open and close without any interference from the newly installed steps. Make any necessary adjustments to ensure smooth operation.
Installation Complete
Once you've confirmed proper door operation, your GlowStep Revolution Uprising steps are successfully installed and ready to use.
Need Additional Support?
If you have questions during your installation or need further assistance, Torklift International offers multiple support options:
- Visit torklift.com for resources and information
- Call 800-246-8132 to speak with a product specialist
Frequently Asked Questions
What tools do I need to install the GlowStep Revolution Uprising steps?
Based on the installation process, you'll need a 7/32 drill bit at minimum. The low profile socket head screws are included with your purchase.
Do I need to remove trim or molding from my RV?
It depends on your specific RV model. Some RVs require removal of threshold kick molding or modification of decorative trim, while others do not.
How do I know which step configuration is right for my RV?
Proper measurements of your RV doorway will determine the correct step configuration. Torklift provides a dedicated measurement video to guide you through this process.
Can the steps be easily removed?
Yes. The GlowStep Revolution Uprising is designed as a quick-disconnect step system that attaches and detaches in seconds.
What if my RV threshold is a different size?
The steps are adjustable. You can modify the studs on the inside of the mounting bracket to accommodate varying RV threshold sizes.
How do I ensure the door will still operate properly after installation?
After completing the installation, test your door to make sure it opens and closes without interference. Adjust the step positioning if needed.